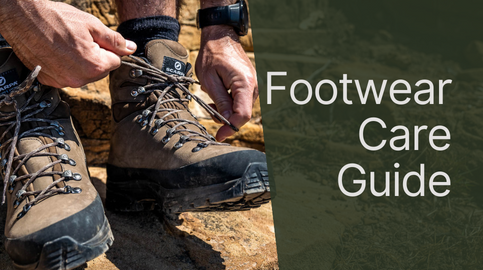
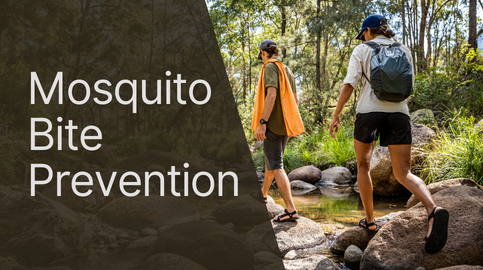
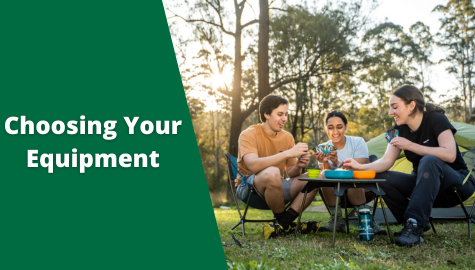
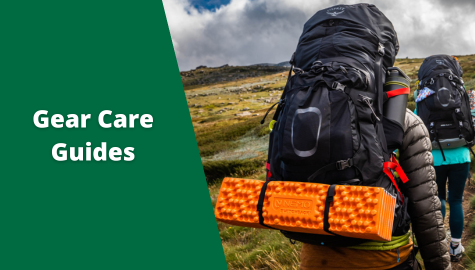
Hiking Sale Now On!

Learn how to make the right decision the first time and avoid being caught out under-prepared in the middle of nowhere!


How to Choose Your Equipment:

General Technical Information:

Outdoor Information:

Choosing Footwear How to Fit a Pack Hypothermia - The Cold Truth
Choosing Socks
Loading Your Pack
Layering 
Choosing a Pack Why Use Duck or Goose Down Snake Awareness & Protection
Choosing a Daypack BPA Bottles & Paddy Pallin Safe Drinking Water 
Choosing a Stove Gore-tex: Pro Shell Outerwear Caring for Your Feet (Blister Prevention)
Choosing a Tent   Caring for Your Feet (Blister Treatment)
Choosing Trekking Poles   Basics of Navigation
Choosing a Torch   Types of Climbing
Choosing a Water Filter    


Choosing Footwear

Back to top↑

No other piece of equipment can affect your enjoyment of a trip as much as your footwear. With a comfortable pair of boots you’ll eat up the miles, but in ill-fitting or inappropriate footwear, you can be painfully aware of every step you take. Good footwear is essential, but what is good for one person may not be good for the next person, or even the next trip.

There's a huge range of suitable footwear on offer, and only you can decide what feels best for you. However the expert staff at Paddy Pallin can advise you on what footwear will best suit your needs.

Some things that you may need to consider before choosing are, the intended purpose for your footwear, the sort of ground you will be traversing, keeping your feet dry, ankle support comparative to the weight you`re carrying, durability, cost and weight plus more. The good news is that there are so many good products on the market now that there is bound to be something just right for you. Hopefully we can help you find it in a Paddy Pallin store or on online at www.paddypallin.com.au

Consider the type of trip you are planning:

Outdoor footwear can be divided into a few basic categories, mountaineering, trekking/bush walking, hiking, trail running, day walking, approach, travel, and sandals. Some of these categories can overlap others are quite specific. Consider the purpose which you will be using your footwear for most.

Mountaineering: boots designed for mountaineering, glacier travel, or aggressive backcountry travel. These boots are stiff and very durable. Mountaineering boots are compatible with step-in crampons for more technical walking/climbing. Click here to view  

Trekking/bushwalking: Boots designed for long distance walks over moderate to rough terrain with moderate to heavy backpacking loads. They are designed with multi-day trips in mind. Durable and supportive, they provide a high degree of ankle and foot protection and as a result, they are heavier, and will take longer to break in than hiking boots. Emphasis is on control, long-term support, water-resistance and the boots' ability to withstand abuse. Some are stiff enough to accept crampons for snow/ice travel. Click here to view mens or Click here to view womens 

Hiking: Boots designed for use on two to three day walks with light to moderate backpacking loads both on and off the beaten track. Although emphasis is still on lightness and comfort, these boots should also be durable, water resistant and supportive. Click here to view mens or Click here to view womens

Trail running: Lightweight technical shoes designed with running in mind but with greater stability/ support and more durable tread to withstand the rigors of the trail. Trail runners will often available with waterproof lining. Click here to view mens or Click here to view womens

Day walking: Boots and shoes designed for day walking and very short overnight trips only. With an emphasis is on lightness, comfort, stability and breathability. They will less supportive and durable than traditional trekking and hiking boots. Click here to view mens    or Click here to view womens

Approach Shoes: Often quite similar to day walking shoes but with a softer rubber compound in the sole for better grip on technical terrain. Approach shoes are traditionally for walking to an activity such as rock climbing, but they are a comfortable and supportive option for many outdoor pursuits. Click here to view mens or Click here to view womens  

Travel: Shoes designed with travel in mind. Often simple and fashionable yet offering the support and foot bed of a more technical shoe. Travel shoes are designed as an option which covers all bases on your adventure, from going out on the town to short walks/ adventures. Click here to view mens  or Click here to view womens

Sandals: Durable, all purpose sports sandals are designed for walking and water wear with Technical foot beds and athletically inspired outsoles for traction on a variety of surfaces. Lightweight sandals offer stability and comfort for everything from day walks to days at the beach.  Click here to view mens or Click here to view womens


Footwear Materials

The materials used in a given boot or shoe will affect its weight, breathability, durability and water-resistance. Different fabrics can be very similar in performance, so again the intended purpose of your footwear is often the key when deciding upon materials.

Full-grain leather: Leather that is denser and therefore more water resistant, durable and   supportive. It is used primarily in boots designed for extended trips, heavy loads and hard terrain. It conforms well to the foot over time, can be waterproofed, is abrasion resistant and will last for years when properly cared for. Many great leather footwear care products are available in Paddy Pallin stores or online Click here to view Full-grain leather requires a break-in period.

Nubuck leather: Softer full grain leather, distinguishable by its sanded, textured finish that looks close to suede. This finish is more resistant to marking than a full grain leather and requires less break in time. Because nubuck is softer it requires more maintenance. Otherwise it has similar characteristics to full-grain leather.

Suede:  Light weight but still water resistant and durable. Compared to full-grain leather, it is generally less abrasion resistant, is more prone to stretching and less stiff,. Although suede is less durable, its flexibility, breathability and lower price make it a good choice for lightweight boots and shoes.

Fabric:  Often used in lighter shoes as either a mesh or 1000 denier nylon for its breathability, low cost and relative ease of breaking in. Fabric is often used in conjunction with suede or leather to construct footwear that achieves a good balance of being lightweight and breathable while remaining supportive. Fabric footwear may come with a waterproof membrane as it is difficult to waterproof. There are products available in Paddy Pallin stores or online at www.paddypallin.com.au which will improve the water resistance in fabric footwear. Fabric is not as durable as leather, so it is usually found only in lighter-duty footwear.

Plastics: Used in mountaineering boots, Plastics provide absolute water-proofness and durability. The rigidity of plastic boots makes them well suited to use with crampons in extreme conditions. Plastics, however, will not soften or break in and are used almost exclusively in "double" boots where a padded inner boot buffers the foot from the outer shell.

Waterproof membranes: Breathable water proof membranes like GORE-TEX® and eVent are often built into footwear to improve water resistance. Such membranes are available in a many of the boots and shoes available in Paddy Pallin stores or online at www.paddypallin.com.au. The plastics used are often porous. They work on a basis of water vapour droplets being much smaller than liquid and the holes in the plastic being larger than vapour droplets and smaller than water droplets. Therefore the heat generated by your feet during activity turns sweat and water into vapour allowing moisture to escape without allowing larger water droplets in. for this reason it is important to choose the correct care products for shoe protection and longevity. Waxes will block the pores in the holes and reduce the breathable performance of the waterproof membrane. Stick to the manufactures instructions or ask the expert staff in Paddy Pallin stores also checkout the products available online Click here to view


Buying Footwear Online:

Because of the nature of online purchasing unfortunately footwear cannot be returned  once you`ve used them out on the trail, due to the fact they may be dirty, smelly, or scuffed. In fact at Paddy Pallin we recommend that you try your footwear inside your home and walk around where there is no chance of damaging the shoe just in case it`s not what you expected. Here are some ways to test if the shoes you have chosen are fitting correctly without taking them into an outdoor situation.

Fitting footwear: Once you have narrowed down the options to a handful of boots or shoes, the best way to decide between them is to try them on, as every boot model is built around a different "last" (standard foot shape), so each one will fit you a little differently. Don't rely solely on your usual shoe size when searching for the best fitting boots or shoes as one manufacturer's sizing may vary from another's. Charts are available at www.paddypallin.com.au which explain an individual manufacturers sizing interpretation.

Boots or shoes must fit well. Try to be certain.

  • Before fitting, test the flex of the sole, it must bend where your foot does, at the ball of the foot. (Allow for some initial stiffness of the sole.)
  • Pick the right socks. Wear the type of socks and sock liners that you will be wearing when you use the shoe.
  • If one foot is larger than the other (which is quite common), fit your larger foot first. You may need to use extra socks or an insert to take up extra space in the other boot.
  • Put your feet in but before you lace up Slide your feet forward in the unlaced boots (As if your foot were sliding when walking down a hill, bend your knee slightly, (As if to mimic the way your foot may lift when walking.) try to stick a finger between your heel and the back of the shoe, one finger should fit snuggly behind the foot, but not two. (If two fingers fit stacked together then the shoes are too big.)
  • Kick the feet back in the boots and lace up firmly. The 'ears' of the boot at the lace holes must be well separated.
  • Do some deep knee bends. The heels should not rise in the boots more than about 3mm.
  • Stand with the heels hooked on the edge of a step and your mass pushing your feet forward in the boots. Your toes must be free to wriggle and should not touch the front of the boots.
  • Stand flat on the floor with someone holding the boots to restrain them from moving. Try to move the front of the feet sideways with the heel as the pivot. No side movement of the ball of the foot should be noticeable.

If your feet feel like they are "floating" inside the boots, you may require a pair half a size down. If your foot feels cramped or your toes make contact with the front or sides of the toe box, you may require the next size up. If the boots are a little tight sideways, remember that, they often stretch in width, but never change in length. The fitting of heels and toes is more important. New boots may feel a little stiff at first, but they should still be comfortable.

NOTE: Most manufacturers design footwear for both men and women. Women's are usually distinguished by a narrower heel cup and foot-bed.

NOTE: Feet often swell becoming longer and wider, with both walking and the carrying of a load, so please take this into account.

Remember: Your boots will need “breaking in” please visit the self care advice within paddies diaries Outdoor Library


Choosing Socks

 Back to top

Everybody knows how vital good footwear is, yet we somehow only seem to consider the boot or shoe a lot of the time. It doesn’t matter how good your boots are, if your socks are uncomfortable or poor quality you may as well be wearing possum skins. Because the condition of your feet is so closely tied to your overall comfort, it only makes sense to spend the extra time and dollars on a pair of good socks. But what constitutes a good pair of socks?

We feel that a good sock possesses a few essential qualities.

  • Most importantly, they should be comfortable.
  • They should be tough.
  • They should keep moisture away from the skin.

Socks must be chosen carefully to match activities you have planned and the weather conditions you expect on your trip. Often you may find that it pays to carry a couple of different types of socks to better cover your needs. 

Basic sock types

Liners: Sock liners are thin, lightweight wicking socks designed to be worn right next to your skin. Liners help reduce the possibility of  blisters by wicking sweat away from the surface of your foot to keep you dry and reducing the amount of abrasion between your outer sock and your skin. They are purpose designed to be worn under other socks. They are available in both warm and cold weather versions. Paddy Pallin stocks a variety of liners including Icebreaker, and Wigwam.

Racing socks: Racing socks are technical lightweight socks designed for running, triathlon, and adventure racing. Generally lightweight, technical socks they offer protection in key wear areas, support, breathability and moisture wicking ability to keep your feet dry during the race. Click here to view

Lightweight walking socks: Are technical socks designed for warm conditions and light footwear. Lightweight walking socks favour wicking, performance, breathability and comfort over warmth. These sock`s are thicker, warmer and more durable than racing socks and will provide more cushioning with extra ankle height for wearing with boots. Click here to view or drop into a Paddy Pallin store to see how they feel. 

Hiking socks: Thicker and warmer than the lightweight version Hiking socks provide reliable cushioning and insulation in moderate to cold conditions and are also better suited to heavy weight boots trekking. Many models have extra padding built into high-impact areas like the heel and the ball of the foot for maximum comfort. These socks can also be worn with liners to improve wicking, comfort and warmth. Click here to view

Mountaineering socks: Mountaineering socks are generally the thickest, warmest and most cushioned socks available. Mountaineering socks offer technical construction for support in all the right areas for when you are wearing heavy stiff boots. They are designed for long trips, tough terrain in cold temperatures. Click here to view 

Ski socks: Designed specifically for wearing with ski`s. Ski socks are long, thick and warm with plenty of support in all the appropriate areas and extra calf support to help them stay up.  

The material world

One of the most confusing issues when choosing a pair of socks, is understanding what the different materials actually are and their functional benefits. Many socks combine a number of different materials and even construction techniques, to optimise performance. Check out Paddy Pallin`s great range of socks in store or Click here to view  

Natural fibres

Cotton: Cotton is not recommended as a sock material for travel or the outdoors. Cotton absorbs sweat, dries slowly and it provides no insulation when wet, this may lead to discomfort and blisters.

Wool: Each wool fibre is made up of millions of "coiled springs," that stretch in use, but coil back to their original positions. It features inherent qualities such as warmth when wet, cushioning, shape recovery (resiliency) and it breathes with your body. It can be knit in various weights to provide increasing levels of insulation for every temperature. Wool yarn, when knit into a thicker sock, tends to be bulky and lofty. Air becomes entrapped and it becomes an ideal insulator. Wool socks also keep feet drier because wool absorbs as much as 30% of its own weight before it begins to feel damp. Unfortunately, wool can take a long time to dry and it can be scratchy/ uncomfortable next to your skin the use of a liner sock such as a Wigwam Gobi Liner is recommended.

Merino Wool: Merino wool is the perfect material for socks it maintains all the characteristics of classic wool but it is lighter and much more comfortable against the skin. Merino wool does not itch and is shrink-treated to hold its size and shape even after repeated washing. Perhaps one of the best qualities of merino wool in socks is its anti odour quality. Paddy Pallin stores stock a range of merino wool socks including Icebreaker Hiker Lite and Wigwam Merino Lite Hiker or the Wigwam Merino Comfort Hiker.

Synthetic fibres

Synthetic materials are designed to insulate like wool and wick moisture, without the negatives mentioned above. These materials trap warmth like wool The synthetic wicking materials like polypropylene and Coolmax used in wicking sock liners are often woven into thicker walking socks as well, to enhance wicking performance. They also dry more quickly and are more abrasion resistant. These fabrics are available in a variety of sock styles and thicknesses. Click here to view or Paddy Pallin`s excellent staff can help you in store to find the right mix.

Acrylic: A synthetic fibre that provides softness and warmth with little weight, and high durability.

Nylon Stretch Nylon: A very strong, versatile, hard wearing fibre. Socks made of nylon can be thin and silky or bulky and highly elastic. Nylon is often used with other fibres to give added stretch or to improve durability.

Polyester & Stretch Polyester: Two hydrophobic (moisture repelling) fibres that are known for their durability.

Polypropylene: A fibre that won't accept moisture. It is used alone or with absorbent outer layers that work together to wick moisture away from your body. It is very strong and it`s the lightest of any synthetic fibre.

Test your socks

Take a quick walk in the sock styles you are considering before a major trip to get a feel for how much cushioning they have, the overall comfort, and see whether they wick enough for your feet. Visit a Paddy Pallin store or talk to us online at Paddyinfo@paddypallin.com.au, work through some of the pointers mentioned above and combine them with time in the field, you will figure out what socks will work best for you.


Choosing a Pack

Back to top↑

There’s something liberating about reducing the necessities of life to the contents of a backpack and setting out on an adventure, be it bush walking, travelling, or climbing mountains, back packs are designed for you to carry your life on your back. Paddy Pallin can help accommodate your life choice with the best pack for your purpose.

How to choose a backpack:

There is a wide array of backpacks available so it's important to have some idea of what you require and what to look for. You should first decide what sort of trips you will be doing for the next few years find the most frequent activity base and work from there. There are certain shapes and features of packs which have been designed to accommodate the differing needs of today`s adventurer. There are hybrid packs which cover a more varied activity base, but to simplify it there are two main types of pack, travel and rucksack.

Rucksacks: Primarily used for wilderness based activities, such as bushwalking, mountaineering and skiing, rucksacks are designed to be highly stable, comfortable to carry for long periods and weatherproof. Choosing a rucksack can depend on many things, Long trips and cold climates call for larger packs; densely vegetated country calls for a tough and slim pack without side pockets to catch on scrub. Mountaineering packs will often come with plenty of attachments so that you can access gear quickly without having to remove your gloves and rummage around. Packs can be a major investment in your outdoor kit so it`s important to cover as many of your core needs as possible. There is a large range of packs in Paddy Pallin stores combined with expert advice to make your choice easy. You can also check out the pack range online at www.paddypallin.com.au

Rucksack size: Both the volume of the pack (in litres) and its length are important. If there is any chance of you going on extended trips it is better to err towards the largest capacity pack hat matches your back length. This avoids the risk of having to strap essentials onto the outside of the pack. Typical volumes and their uses are shown below.

  • Up to 30 litres: Good for day walking or an overnight trip in warm weather where your needs will be minimal.
  • 30 to 50 litres: Enough space for a 1 or 2 day trip.  
  • 50 to 65 litres: Generally good for up to 3 days of overnight camping.
  • 65 to 85 litres: Can accommodate up to 6 days of overnight camping.  
  • 85 litres plus: For long walks/treks lasting a week or more.


Features to consider on Rucksacks

Loading options: Most rucksacks are "top-loaders," where all gear passes through one big hole at the top of the packs main compartment. This requires you to keep quick-access items near the top. Some rucksacks provide zippered, openings on the sides or at the bottom their main compartments for quick access.

Harness system: Everybody`s shape is different, Therefore there are many varieties of harnessing systems. Look for gender specific packs or packs that come in different back lengths to best accommodate your body shape.  If a pack`s harness is well fitted the majority of the weight should be taken by the hips via the hip belt, as the lowered centre of gravity will have less affect on your balance and posture, and you won`t have as much discomfort around the shoulders. Osprey packs offer a customised fit heat treatment with their hip belts. There are also other systems which will adjust the tilt of the hip belt, to tailor to your specific. The staff at Paddy Pallin are expert pack fitters so drop by a store and see which one suits you best.

Pockets and Attachments: Depending on your chosen activity you may benefit from the array of different options for attachments available in Paddy Pallin`s Rucksack range. The style of your pack is dependent on your needs. Most bush walking packs will be a fairly simple design, slim and robust with minimal attachments to minimize snagging and scraping when walking through closed in bush land. More technical packs designed for multiple activities or mountaineering packs will have multiple attachments and lash points for things such as ice axes, skis, snow shoes etc. as well as different access points throughout the pack. All of the extra attachments and zips will add weight to your pack. This is often counter acted by pack manufacturers using lighter weight fabrics, the pay off being that they are less resistant to abrasion. For a great hybrid option checkout the Osprey Xena for women or the Osprey Xenith for men, in Paddy Pallin stores or at www.paddypallin.com.au.


Travel Packs: A great option for adventure travelers who won`t just be catching cabs from the airport to the nearest hotel. Packed with features and options travel packs really are the go anywhere option for travelers and backpackers. Travel packs are defined by the access available in that they will usually have a zipper which allows you open the entire front of the pack to access your gear like a suitcase. Travel packs may also have attachments like handles, concealed shoulder straps, detachable day packs, harness covers etc.

Travel pack sizes: Travel packs are available in a range of sizes from 60 litres up. The size that you require of your travel pack will be determined by your body shape and size, as well as how much stuff you think you need. Travel packs are available in gender specific and different back lengths for the best fit and feature knowledge visit a Paddy Pallin store and see an expert pack fitter, or purchase the pack you want online at www.paddypallin.com.au


Features to consider on Travel Packs:

Loading options: Travel packs have a wide and varied range of loading options. The defining option of a travel pack is the option to open the pack via the front zip like a suitcase. Some travel packs will offer multiple access options such as a separable compartment in the bottom of the pack for quick access to stuff you might need without messing up or uncompressing your well packed bag. Hybrid options might have a rucksack shape providing the option to top load as well. Check out the loading options available at www.paddypallin.com.au/equipment/packs

Harness system: The harness system on travel packs can vary greatly depending on how much you intend on having your travel pack on your back. Fully supportive harnesses similar to a high quality bush walking pack are available for those who have many adventures on which they will require their pack. Less supportive harnesses are available for those who may need to carry their pack on their back less frequently, the more supportive and elaborate your harness the greater the weight and expense. Choose your adventure and your harness requirements will become evident.  

Features and Attachments: A good travel pack as a minimum should have a couple of typical features, for example a harness cover and a handle for ease and safety during transit. From there the options could include things like separable compartments for easy access without disturbing your  well packed gear, interior compression straps to help you squeeze it all in, stow away shoulder straps for tramping around the airport, document pockets, laundry pockets, lockable zips, a rain cover, or a detachable day pack for day trips or carry on luggage. The professional staff in Paddy Pallin stores can help you find the right pack or visit online Click here to view


We Stock:

At Paddy Pallin we stock packs made by Osprey, The North Face, and Pacsafe.


Choosing a Daypack

Back to top↑

Bushwalking, cycling, skiing, climbing, running, fishing, shopping, carrying textbooks. Whatever your pursuit, it's likely a daypack has already been designed to help you enjoy it with greater ease and convenience. Traditionally small fabric packs with little or no internal support. Day packs are designed for shorter, low-capacity/ requirement activities. Simple day packs will concentrate the weight of a loaded pack on the shoulders. More technical day packs will come with greater support, in the way of a hip strap and sternum strap, as well as any number of features which directly relate to your activity of choice.  

There is a huge range of daypacks available in Paddy Pallin stores or online at www.paddypallin.com.au Paddy Pallin stock day packs made by Osprey, The North Face, Black Wolf, Pacsafe, and Patagonia

How to Choose a Daypack

The key to choosing a daypack is to match the pack to the activities you have in mind, making sure to include the features that you value the most, for example, a large capacity, pockets, compartments for organizing gear, ice axe loops, helmet clip etc.

Features to consider on daypacks:

Bushwalking: Stick with a narrow-profile pack, one that includes a padded back or a frame. A hip belt and a sternum strap are a good idea. As you may often be walking in a variety of environments you may need a larger capacity (30 litres plus) pack to accommodate extra clothing etc.

Rock climbing: Rock climbing can require a range of packs depending on your aspirations. A close fitting technical daypack with a lower centre of gravity is best (This helps to lessen the effect of wearing a pack on your balance when climbing). Compare your standard equipment load (ropes, carabiners, shoes etc.) with the list of specialized features a pack may provide (ground sheet, internal pockets, daisy chain, crampon straps). A sternum strap and a variety of compression straps (which consolidate your load and keep it from shifting) are also important.

Ski touring: Choose a pack with a narrow profile pack with hip and sternum straps to allow for greater balance and increased arm movements. Your capacity requirements will be determined by the length of your trip. (Remember that you will need some extra gear and clothing in the snow.) Pockets or compression straps on the sides of the pack can be handy when carrying your skis.  

Bush running/multi-sports: Bum bags and hydration packs are both good options for trail running and adventure racing bum bags are usually more stable while you run, and keep your back clear to allow perspiration to escape. If you require more carrying capacity than this or prefer to use a drinking tube then a hydration pack or a close fitting technical daypack may be preferable.

Work/school/university: Daypacks have become handy and practical replacement for briefcases and shoulder bags for many people in recent times. If carrying books and a laptop is your primary requirement, there are many daypacks designed specifically with this in mind, with padded laptop compartments, book bags, slots and sleeves for digital devices etc. Many manufacturers produce a hybrid style pack that will cater for your needs on and off the streets.

Hydration packs: Hydration packs are available in a range of sizes and styles, from small packs with only room for your water and keys to larger technical packs. Designed for active use hydration packs are usually close fitting daypacks that include a removable reservoir (or bladder) with a sipping hose attached. (Consideration should be given to your specific needs.) The drinking end of the hose is clipped to one shoulder strap for easy access, so you can remain active without dropping your pack in order to take a drink.

Bum bags: Bum Bags are a compact unit ideal for day walkers, runners, skiers and even city walkers, who want the benefit of an extra pocket without the hassle of carrying a pack. Bum bags are often available with a hydration option as well ether in the form of bottle holders or a removable bladder. For longer outdoor walks on hotter days, a bum bag and the full ventilation it affords your back is a great option.

Daypack styles:
Day packs come with access in two styles. Front or zip loading or top loading. Front or zip loading daypacks feature a panel-loading style, where the main storage compartment is accessed via a long, U-shaped zipper. Fully opened, one side of the compartment falls away like a flap. This wide opening makes it easy to access items such as clothing or books, which may be more difficult to locate in a top loading pack. (often packs used an urban or travel capacity will be designed in this fashion.) 

The benefits of top loading or rucksack style packs can be that they usually do a better job of keeping gear from shifting, especially if they offer compression straps. For activities where balance is vital (climbing, ski touring, walking, cycling, or trail running), or a greater degree of water repellency. (Zippers tend to allow seepage even if covered by a flap)

Daypack Materials:

Day packs are a science all of their own when it comes to fabrics and features. Light weight fabrics such as Siliconized Nylon are great for adventure racing and highly active sports where weight is everything, it is however less durable than a heavier fabric such as Canvas. Although slightly heavier, canvas is more water and abrasion resistant-resistant than nylon. Cordura is another fabric used in day packs which is again more durable than Nylon but generally lighter than canvas. No pack can be considered totally waterproof, so in wet conditions we recommend the use of a pack liner or cover available from Paddy Pallin stores or on line Click here to view


Choosing a Stove

Back to top↑

It used to be that nothing could compare to a hot meal cooked over an open fire while camping beneath the stars. But with a focus and a greater appreciation these days on minimal impact camping choosing a lightweight, portable stove for your camping/ travelling adventure is a must. To find the right stove it is important to consider the kinds of trips you want to take and the sort of meals you want to enjoy (culinary ability aside). Also you will need to consider how many people you will be cooking for, what kinds of temperatures or altitudes you will be cooking in (which may affect the kinds of fuels you burn) and which areas or countries you will be in. ( This may determine what fuels are readily available).

Stove shapes, sizes, designs and Fuel source

Stoves come in all kinds of shapes, sizes and designs. It is important to look at stove design from the functional aspects of reliability, use ability and weight and space restrictions. Some factors to consider are:

How easy is the stove to set up? Does it require assembly every time it's used? If so, is the assembly easy or complex?

Is the stove sturdy? Is it stable on uneven ground? How hard is it to balance a pot on top?

If a gas canister is used, is it easy to attach and remove? Can it be detached before it's completely empty?

How easy is the stove to light? Does it require priming? Can it be primed with fuel from the stove itself?

How easy is the stove to control? Can the heat output be adjusted easily? How easy is the stove to maintain in the field?

Different Fuel Sources:

Choosing the right fuel option for your stove is one of the primary considerations. Take a few minutes to decide which one will work best for you and this will also help narrow down the number of choices. The various fuels and their benefits/weaknesses are discussed below.

Liquid Petroleum Gas:

This is the generic name for the perhaps more commonly known fuels butane, iso-butane and propane. The types of stoves that use these are probably the easiest ones to use and require the least maintenance. The fuel is contained in pressurised canisters, which are available in most industrialised parts of the world, though they are almost impossible to find in some regions. In this range Paddy Pallin offer Trangia, MSR , 360 Degrees, Jetboil and Optimus stoves in stores or online at www.paddypallin.com.au

Recommendation: These stoves are light weight, ideal for general camping where you require a quick easy heat source.

Positives: 

  • Convenient, clean burning and easy to light
  • Burn hot immediately and do not require priming
  • Can be adjusted easily for simmering
  • Can't be spilt when in transit

Negatives: 

  • More expensive than other fuel types
  • You must carry and dispose of the fuel canisters (although they are now recyclable)
  • Performance may decrease in temperatures below freezing
  • Fuel is not always readily available

In general, LP stoves are more affected by temperature than white gas and multi fuel stoves because the user has no control over the internal pressure of the gas chamber (no pump). Liquid butane vaporises in its canister, creating the pressure that pushes it through the fuel line. As the temperature drops outside, the pressure inside the canister decreases. At sea level, normal butane stops vaporising at 0 degrees C. Butane/Propane and iso-butane work at much lower temperatures depending on the blend (ratio of butane to propane).

White Gas and Multi-Fuel stoves (Unleaded petrol, Aviation fuel, solvent):

 Probably one of the most popular types of stoves around, white gas and multi-fuel stoves can be used in both backcountry and international environments. White gas is also sold as Naphtha, camp fuel, or lighter fuel and can be found in outdoor stores, some service stations and hardware stores in North America, Australia and New Zealand. The lack of white gas in other parts of the world makes the multi-fuel option of these types of stoves more important. Paddy Pallin offers MSR and Optimus ranges of these stoves in stores or at www.paddypallin.com.au

These types of stoves are easy to operate and maintain, and are generally considered quite reliable. However, because of the volatility of the fuel, their use may not be suitable in all environments. Relative to LPG stoves, these stoves can also require more maintenance.

Many (but not all) white gas stoves can be adapted for multi-fuel use (though they tend to be a little more expensive) which means with simple modifications, they can operate using other fuels like kerosene, automotive and aviation fuel. These types of stoves are highly suited to users who may find themselves in environments where white gas is not available. These types of stoves require priming/ pressure regulation of the fuel canister and fuel line. The process is best instructed via the manufacturer`s instructions.

Recommendation: These stoves are great overall performers, perfect for travel around the world (including remote regions if you have a multi fuel option) and suitable in just about any weather conditions. They are generally reliable, inexpensive and efficient.

White gas:
Positives:

  • Inexpensive, easy to find throughout most industrialised countries
  • Clean, easy to light
  • Spilled fuel evaporates quickly

Negatives:

  • Volatile (spilled fuel can ignite quickly)
  • Priming is required (fuel from the stove can be used)
  • Can be hard to find in some countries

Unleaded petrol, Aviation fuel, Solvent:
Positives:
 

  • Very inexpensive, easy to find throughout the world

Negatives: 

  • Burns dirty/sooty
  • Extremely volatile


Kerosene:

The use of kerosene is often dictated by the country you are travelling where many of the other fuel alternatives are not available. Kerosene stoves also require the use of white gas, alcohol or priming paste as a separate priming agent. Paddy Pallin offers MSR and Optimus ranges of these stoves in stores or at www.paddypallin.com.au

Recommendation: Kerosene burning stoves offer a cheap and versatile fuel option for backpackers that plan on travelling off the beaten track in less developed countries.

Positives:

  • Inexpensive
  • Easy to find (throughout the world)
  • High heat output
  • Spilled fuel does not ignite easily
  • Can be used in many of the multi-fuel stoves

Negatives:

  • Somewhat messy (burns dirty, smelly)
  • Priming is required (best if different priming fuel is used), as kerosene tends to gum up stove parts
  • Spilled fuel evaporates slowly.


Methylated spirits or Denatured Alcohol:

While unavailable in some parts of the world, this is the only fuel that does not require pressure for stove operation. Unfortunately, methyl alcohol does not burn at very high temperature and will produce about half the amount of heat as the same weight in gasoline or kerosene. Trangia is one example of this style of stove offered by Paddy Pallin in stores or at www.paddypallin.com.au

Recommendation: These stoves offer an environmentally sensitive option for backpackers and campers who enjoy the quiet of these slow burning stoves and are not pushed for time on their travels. It is possible to carry an extremely reliable, light and compact emergency stove which using this as a fuel source as a backup stove.

Positives:

  • A renewable fuel resource, low volatility
  • Burns almost silently

Alcohol-burning stoves tend to have fewer moving parts than other types, lowering the chance of breakdown.

Negatives:

  • Lower heat output, so cooking takes longer and requires more fuel
  • Fuel can be hard to find in many countries

Priming:

Priming is the process of igniting a small amount of stove fuel (or other flammable substance) at the base of the burner unit to warm up the fuel's path before the stove is lit. This process heats up the burner, the fuel line and the generator so that when the stove is first turned on, liquid fuel will come out of the jet already vaporised for easy lighting.

Priming is not necessary for stoves that use compressed gas fuels, since the fuel is already a gas when it reaches the burner. Some regular stove fuels (like white gas) can be used both for priming and regular stove operation. Others (like unleaded gas or kerosene) do not work well for priming. If you have trouble using your regular fuel for priming, carry a small container of priming paste or alcohol to use instead.

Stove Performance -

One of the best ways to compare performance is to review in store comparison charts at Paddy Pallin or online Click here to view or research any available stove literature. Some of the more telling statistics include

  • Average boiling time -This measures how hot the stove burns.
  • Water boiled per unit of fuel - This measures how efficient the stove is.
  • Burn time at maximum flame - This measures how long the stove will burn on a given supply of fuel before it has to be refilled
  • Weight, shape and size


Choosing a Tent

 Back to top↑

A tent frees you. It is your home away from home, your sanctuary from the battering winds, driving rain, and bitter cold which often come hand in hand with many adventures. The warmth and comfort of your tent can make it the ultimate haven as long as you have chosen the right tent for the conditions. If you don’t have the right tent for the conditions it could be disastrous. When choosing a tent you should consider what conditions you are likely to encounter in that part of the world and make sure that the tent is designed to withstand the worst that Mother Nature has to offer. Other important characteristics include quality, size, weight, and internal space.

Tent classification:

Most tents are classified as two, three season, four season, or expedition tents

Two season tents: Designed primarily as a summer-weight tent, with the emphasis on lightweight and great ventilation.

Three season tents: These have less mesh in the inner tent, a more generous fly, typically a more rugged pole setup and a larger vestibule/s, than two season tents. These tents are designed for general camping in all but the most extreme weather, or snow conditions.

Four season tents: Offer shelter and protection for more extreme circumstances including camping above the snowline. Generally they are designed from heavier, more abrasion-resistant fabrics and the tent is reinforced at stress points. Poles are heavier to withstand snow loading.

Expedition tents: These tents are designed for minimum weight and maximum protection from the elements. An expedition tent will include all the features of a four season tent, while being made out of the most advanced materials with extra features for extremely harsh conditions at high altitudes

Note: No tent can survive all possible conditions. Use common sense by setting up your tent in the most sheltered area available, and if necessary build snow or rock walls for additional protection.


Styles of tent:

The style or shape of a tent is important for a number of reasons. The different shapes offer different strengths and facilities and also affect the ease of use, and the weight.

Hoop tents: Have a single hoop in the middle these tents are quite light in comparison to other tents with more than one pole. They characteristically have a single entrance and trade off inner space and rigidity for weight savings. The entrance is located on the side of the tent. Click here to view

Dome tents: Provide a much more stable structure and consist of at least two poles crossing at the apex and connecting the diagonally opposed corners of the rectangular base. A third pole makes for an even stronger configuration. Most dome tents consist of two side doors and two vestibules. Because of their uniform shape they don’t require pitching longitudinally to the prevailing wind. Entrances to dome tents are on the side of the tent and generally allow for easier access. Click here to view

Tunnel tents: Are elongated tents, which are better suited to snow loading and more extreme conditions, particularly those with three pole hoops (to maximize this the tent should be pitched perpendicular to the prevailing wind). Entrance to a tunnel tent is located at the end and many will have two openings and vestibules. Click here to view

Bivvy Bags: Bivvy bags are the lightest weight and minimalist option. They are simply a weather proof mummy shaped bag with enough room to slide yourself and a little bit of gear inside giving you protection from the elements. 

Size

Manufacturers classify their tents according to sleeping capacity, which ranges from 1 person to many. This rating refers to the number of people who can sleep side by side within the tent inner.  Within the Paddy Pallin range we focus mostly on one to four person tents.

Consider a tent that will adapt well to some of your other travel plans. If you are planning solo walks, or a long-distance bike trip, a 1-to-2-person model might be a good choice. If you are buying a tent for two people and you are not too concerned about weight, consider a 2-to-3-person model, particularly if you enjoy the flexibility of a little extra space. Click here to view

Of course we all come in different shape and sizes, so know your dimensions. Compare your numbers with the floor dimensions of the tent, add your gear to the equation. This should give you some idea of how snug, or spacious, a tent will be. The staff at Paddy Pallin have a wealth of experience in both travel and adventure so drop in to a store and ask for some advice.

Other features to consider

Weight: The weight of your tent will be determined by the both, size and the price. Weight is often a determining factor in choosing a tent because as a rule it is carried with most of the time. Factors which will affect the weight are things like the fabrics used and the poles. 

Poles: Generally more poles will give tents added rigidity and stability. Extra poles, of course, mean extra weight. In a good quality tent the poles will be made of lightweight yet strong aluminum, often in a pre-bent form. Poles connect to the tent in one of two ways, via sleeves or clips. This means you either have to thread the poles through a special sleeve or clip them to the inner. Sleeve tents are considered more stable, and will often be used in multi pitch tents.

Multi-pitch tents: These tents allow you to pitch both the tent inner and fly at the same time, or take down the inner while the fly stays up. This facility and the ability to pitch either just the fly or just the inner tent, provides for excellent flexibility, for example if it`s raining you can just set up the fly and get dry and warm without getting your inner wet.

Vestibule: A vestibule is the extension of the tent`s fly that shields a section of ground outside the inner tent's door. Protected from rain, it is a good place to store your packs and boots overnight, and on some tents there is enough space so you can even cook out of the weather.

Doors: The position and number of the doors on your tent is important, not only for access but for  allowing air flow through the tent to reduce the amount of condensation inside the tent. Click here to view 

Guy points: Guy points are used to establish tautness in your fly during bad weather. Doing so helps your fly shed water effectively and prevents it from sagging and touching the uncoated inner tent. (If the two touch, moisture can get inside the tent).  

Ground sheets: Some manufacturers also produce footprints for their tents, these are customized ground sheets cut to fit a tent's floor design exactly. Most come with attachment points, which connect them to the tent. Both footprints and traditional ground sheets help protect a tent's floor from abrasion and punctures.

Chosen wisely, a tent will add only a modest amount of weight to your load. In return, it will give you the confidence to know you are equipped to take shelter from just about anything you encounter on your trip. Then there is that intangible sense of security that you feel you once you are inside and you zip the door shut for the night. It's impressive how much comfort and reassurance we can find between a few well-stitched panels of nylon.


Choosing Trekking Poles 

   Back to top↑

Starting to get sore knees when you`re walking, don’t let it stop you from doing what you love. Studies have shown that walking with trekking poles reduces the pressure strain on the opposite leg by approximately 20%. Furthermore, while walking on level ground, poles reduce the body weight carried by the legs by approximately 5 kg every step. Move to an incline, and that reduction increases to 8 kg. Think about this in the context of a multi hour walk or run. Using poles lets hikers lengthen their strides, put less strain on their knees, and generally feel more comfortable. The hikers studied did not expend less energy, but the increase in stability made long treks easier.

There are plenty of trekking poles on the market in varying styles, shapes, and sizes here are a few ways in which to choose which one is for you.

Pole Styles

Poles basically come in a few main styles each suited to a purpose many are collapsible, foldable, or telescopic.

Rigid: Describes a rigid pole or a pole with no built in shock system. Often standard poles will be the lightest weight option due to their less complex construction. The majority of the poles sold in Paddy Pallin stores are telescopic they have adjustable lengths and will still collapse down to a packable size. A couple of great options from this range include; Komperdell C3 Carbon Power Lock 3 Pole, Komperdell Wild Rambler, or Black Diamond, have a great lightweight standard option which folds away to a smaller size than the telescopic versions the Black Diamond Distance Carbon Z-Pole, is amazingly light and packable but the payoff is that is not adjustable so it is available in three lengths. Click here to view the full range.

Shock Absorbing: Shock absorbing poles are designed to take some of the impact off the arms when you`re trekking. Some people have found that when using poles that their arms and wrists become fatigued from overcompensating for their legs, so the manufacturers offer models which have either spring or air shock versions of their poles such as the Black Diamond Trail Pro Shock Trekking Poles. Drop by a Paddy Pallin store for some professional trekking pole advise or Click here to view the full Range

Cork: Some people don’t enjoy the feel of rubber others may have an allergy to rubber so trekking pole manufacturer`s offer a cork handled version of some poles. Some cork handled versions in both rigid and shock absorbing poles are; Komperdell Highlander Cork Pole and the Komperdell Walker Power Lock II Pole.


Pole Length:

To gain the most effective use of your pole it needs to be the correct length which put basically is with your arms at a right angle in a relaxed position when you are standing on flat ground. Below is a more in depth description of how to achieve that. 

  1. Extend the lower section of both poles to just less than the maximum limit and "lock" the lower sections.
  2. Stand up straight with shoulders relaxed.
  3. Place one pole under an arm and adjust the length so that the top of the pole is 5 - 8cm below the armpit.
  4. "Lock" the upper section of that pole in place.
  5. Use the fully locked pole as a "ruler" to adjust the length of your second pole.
  6. Completing this procedure should result in a pole length that is a good compromise for both ascending and descending.
  7. Note: Adjustments to pole length should be made within the limits of the manufacturer's recommendations and it might also help you in choosing which model, as it is imperative to get one that is long enough for you.

One Pole or Two?:

All the above comments are about using a pair of poles. One pole will do some of the above but not all. One is better than none but two will provide more than twice the benefit.

If you have knee or back problems, intend to use the poles all the time or are carrying a load, two poles would be recommended. This is why many manufacturers offer poles as a set. Click here to view.


Choosing a Torch

 Back to top↑

Becoming un expectantly benighted in the bush is less than ideal, but it if not all goes well on any given day even the best laid plans can go to waste, and you can find yourself in this situation. A torch or a head torch is a vital piece of safety equipment and at least one should be carried on all your trips big or small.

Choosing a light source option

Head torches: Are by far the most convenient option if you are on the move. A head torch allows you to move freely with both of your hands available so checking out maps or cutting up dinner is made easy.

Head torch technology is constantly evolving they are always getting lighter and brighter. Most torches are constructed with LED bulbs which have a bright white light and, depending on the strength or brightness of the bulb usually have an excellent battery life.

Paddy Pallin stock a great range of head torches from Petzl, Black Diamond, Princeton Tec, and LED Lenser. Click here to view full range. They range from the extremely lightweight with small battery usage for an emergency back up or around camp to much brighter lights with powerful lumens and separate battery packs for night time activities and caving.

To choose the best head torch for yourself you will need to weigh up your intended purpose against your budget, for example if you enjoy a short late night walk down a dimly lit street and occasional camping then you won`t need anything to powerful, perhaps one of the smaller lightweight options with three or four LED`s and triple ‘A’ sized batteries. Or if you are working or playing in the outdoors regularly you may need something with a more powerful light or an adjustable option for multipurpose use.

Hand torches: Still a viable option torches are a very common type of light used in the bush. They can be quite compact lightweight with LED`s and a long battery or large and bulky with a big rechargeable battery and a powerful beam. Smaller hand torches make a great option as a spare torch for bush walkers. Larger hand torches are a great option for car or group camping. They remain a simple, easy to use and you can direct the light exactly where you need it. In Paddy Pallin stores we focus mainly on the lighter weight options of this variety of torch for bush walking or kids going to school camp  

Candle lanterns: Candle lanterns offer reliable, long-lasting performance. They are perfect for activities like reading at night or eating dinner, when you need a moderate level of area light, but you don't want to consume lots of batteries. Candle lanterns offer a good option for bush walkers who like the idea of a lantern without all the weight.

Lanterns: Designed to illuminate large areas, lanterns are good when you are not required to walk far to the campsite. They are generally heavier and bulkier than the other options (Some light weight models are available like the Black Diamond Moji Lantern). and the Princeton Tec Helix Basecamp Lantern). Gas and liquid fueled lanterns are harder to set up and use than lanterns that run on batteries.


Choosing a Water Filter

 Back to top↑

Drinking pure water from clear-flowing stream is one of the simple and fundamental joys of the outdoors. Unfortunately even some of the cleanest, purest water on earth is still susceptible to contamination from microscopic pathogens. (Disease-causing agents) Birds, animals and humans all have an impact. You need to play it safe with water in the wilderness because it’s the worst place to be if you develop a sudden illness.

There are three main types of water contaminants;

  1. Suspended matter (dust, silt, leaves etc.)
  2. Chemical (pesticides, insecticides, etc. which include heavy metals)
  3. Micro organisms (bacteria, protozoa, viruses)

Each one of these contaminants presents in a range of sizes and therefore there are varied filtration and purification methods. Some cover most contaminants but not all, while others will need to be used in combination with each other to provide the safest possible outcome.

Note: For further information on this please refer to the Self care section Paddy`s Diaries.

Filtration Methods:

Boiling: Boiling your water is an effective way to deal with micro organisms as most micro organisms won`t survive past 60 degrees, therefore boiling water for ten minutes is a good way to ensure that these insidious little creatures don’t enter your system. Unfortunately boiling doesn’t really help with suspended matter other filtration methods should be used in conjunction with boiling for the best water quality results.

Purification Tablets: Exposing water to purifying chemicals such as iodine, silver or chlorine is believed to kill bacteria and viruses, but not all protozoa. Giardia and Cryptosporidia are resistant to chemical treatments. Giardia and Cryptosporidia are larger than most filtration devices microfiltration methods allow, so purification in conjunction with microfiltration is recommended if you wish to be absolutely certain that the protozoan have been removed. Also purification tablets will not help remove suspended matter. Water Purification tablets are available in Paddy Pallin stores or online Click here to view. 

Purification tablets do take time to be effective, read the directions carefully and follow them.  

Note: Iodine is a very effective poison, including to humans in large quantities. Pregnant women should not use it or people who may be allergic to it and it can be unhealthy for people who use it for periods of longer than 14 days. Follow manufacturer instructions closely when using iodine or chlorine.


Steripens: Steripen products use ultraviolet (UV) light technology to purify water, destroying more than 99.9 percent of bacteria, viruses and protozoa such as Giardia and Cryptosporidia. Purifying water with UV light offers many advantages. In addition to being safe and effective, UV light does not alter the taste, pH, or other properties of the water, and works without the introduction of chemicals to the water. Again suspended matter remains in the water so microfiltration used in conjunction with Steripen will give you the cleanest results. Steripen products are available in Paddy Pallin store or online Click here to view

Microfiltration: The most popular solution to water contamination, microfilters are specifically designed hand held devices that clean water via a mechanical process, forcing it through a finely porous internal element housed within a filtering unit. Standard microfiltration devices will remove suspended matter, bacteria and protozoa, but not viruses. Viruses are too small to filter effectively and require further purification. Used in combination with purifying tablets, steripen, or boiling microfiltration devices are very effective. Click here to view Paddy Pallin`s range of water treatment products.

Other deciding factors:

Simplicity of use: Steripens and Micropur Tabs are the simplest form of purification as far as ease of use as you can stop at a flowing stream, fill your bottle, add your purification, and move on, no pumping, no setting up a stove and waiting for your water to cool.

Speed of use: Steripens are the fastest method of purification, taking only a few minutes. Using a microfiltration device such as the Katadyn Hiker Pro or the Katadyn Vario is more of a task but will give you water free of suspended particles, bacteria and protozoa in between 5 and 15 minutes depending on rate of the particular pump. Micropur Tabs will take between twenty minutes and an hour before they are totally effective. Boiling will take however long it takes for you to set up your stove boil the water and cool the water.    

Longevity: Microfilters, Micropur Tabs and Steripens have a finite capacity. Microfilters can become blocked with fine particles over time but they can be cleaned and replaced. Micropur tabs have a standard shelf life which is stated on the packaging. Steripens are an electrical device that run on batteries each product in the range will treat differing amounts of water.   

Note: Please refer to the Safe Drinking Water section in the Self care tab of Paddies Diaries for further information on contaminants and purifications. 


How to Fit a Pack

 Back to top↑

Forget about the colour and the features for a moment. What really matters when selecting a new pack is making sure that it's a good fit for your body. Your pack is a major investment in your outdoor  equipment collection. Your pack is supposed to make your adventures more comfortable and more achievable, not cause pain and discomfort. 

When a pack is well fitted the majority of the weight in your pack should sit on your hips via your hip belt. This puts the weight at a lower centre of gravity which will affect your balance less and help you maintain good posture much more effectively than packed weight bouncing around on your shoulders, also it will prevent your shoulders from becoming too fatigued and sore.       

To help achieve this most equipment manufacturers make gender specific packs. These designs take into account that women generally have shorter torsos, wider hips and narrower shoulders than men. Because women's hips are more angular than men's, they form a natural cradle for the hip belt, especially one that is wider at the bottom than the top. Osprey have taken this concept further and developed a heat molding customized system. Drop in to a Paddy Pallin store to see how it`s done or check out the video online at by Clicking here

Back Length: For your hips to be carrying the weight most effectively your back length must be correct. Back length is a crucial measurement. It is important to distinguish between your height and the length of your torso. Just because you are a certain height — say a 6' female or 5' 9" male does not mean you automatically need a "large" or "tall" pack. Your back length, not your height, determines your pack size.

General scale to establish what size range your back length falls into:

Small: 40cm to 47cm

Medium/Regular: 46cm to 52cm

Large/Tall: 51cm to 57cm

Note: Pack manufacturers typically use general terms (small, medium, large) to identify their frame sizes; look at each pack's technical specifications to find the actual numeric range.

Fitting your pack: Once you have established that the back length of your pack is correct you will need to adjust the various straps and buckles on your pack. These adjust the directional pull of the pack load. Here are a few tips.

  • Make sure the hip belt sits firmly on your hips, and the “yoke” (the place where the shoulder harness comes out of the pack) is about 5cms below your C7 vertebrae (the bone that sticks out at the base of your neck). If the pack has a foam hip belt, its centre should rest on your iliac crest. (The upper most point of your hip bone.)
  • The padded sections of the shoulder straps should wrap around the crest of your shoulders comfortably and attach to the frame about 2cms below that point. No gaps should appear.
  • Check the load-lifter/top tension straps. These should attach to your shoulder straps at a point just above your collarbone and just below the top of your shoulders. From there, they should rise up to join with the frame at an angle of between 40 and 50 degrees. If the angle is higher than that, your frame is too long. Any lower and your shoulders will carry too much of the load.
  • Check the shoulder strap length and width. The buckle on the strap should be far enough below your armpit that it won't chafe. The straps should be far enough apart that they don't squeeze your neck, but close enough together that they don't slip off of your shoulders during hiking. The width is sometimes adjustable.
  • Women need to pay special attention to the fit of shoulder straps. On some unisex packs, the distance between shoulder straps may be too wide, or the straps themselves are wide enough to gouge an armpit or breast. If you find a good fit is elusive, seek out a pack designed specifically for women.
  • Check for a good torso fit. If the pack fits you correctly, you should be able to redistribute the weight of the pack between your shoulders and your hips simply by loosening and tightening your shoulder straps slightly.
  • Adjust the sternum strap. Position it about 5cms below your collarbone. You should be able to breathe comfortably when the strap is fastened. It is not essential that you keep your sternum strap fastened but it will stabilise the pack weight which may be helpful when you are negotiating uneven ground.

Some questions to ask:

  • Does the pack feel good on your back?
  • Does it pinch or bind or unusually restrict your movement?
  • Is the pressure in one area greater than any other?
  • Can you look up without hitting the pack with your head?
  • Can you squat down without cutting off the circulation to your legs?


Ideally, make your first trip with your new pack a short one. You can make some modest adjustments during rest stops. Over time, with regular wear, items such as internal stays and the padded hip belt will conform to your body shape.


Loading Your Pack

 Back to top↑

A well packed backpack can be the difference between pleasure and pain when you`re out in the wilderness. It is worth spending some time at home loading your pack with the gear you expect to take on different trips just to see how it fits and how the comfort level of your pack changes when your packing is configured differently.

As a general rule it is best to find a way to get everything inside of your pack to best protect your gear from damage and water. If you`re going to bother carrying it all that way you want it to work when you need it.

Here are some tips which might help with getting the weight and position configuration correct: 

  1. Pack your sleeping bag in its stuff sack at the bottom of your pack. It is the last item you will need each day. The soft bulk of the bag will not dig into your hips and provides a firm platform on which to load your other equipment. The functionality of your sleeping bag is essential when taking shelter in remote areas, for this reason it should be protected as best as you can. Consider extra waterproofing in the form of Sea to Summit Compression Dry Sacks. We strongly recommend that you do not strap it to the outside of your pack where it can be easily damaged, rained on, or stolen.


  1. Folding, rather than rolling, your sleeping mat and loading it vertically against the frame on the inside of the pack helps prevent the contents of your pack from digging into your back. Alternatively you can roll the sleeping mat loosely around the interior of the pack as if it were lining the pack and place the rest your items inside the roll.


  1. Pack heavy items towards the frame of the pack. This keeps the centre of gravity close to your back, allowing you to walk upright. Stoves, fuel, food and similar items are ideally placed here. Try to keep the weight central so as not to over burden one side of your back.


  1. Large heavy gear, such as your tent, should be arranged near to your back and about shoulder height or lower but without too much stuff on top. Having your tent easily accessible is convenient when you stop to set up camp, especially if it`s raining.


  1. Utilise all available space by packing small items such as underwear or socks inside other items or fill the small voids between bulky items etc.


  1. Gear which is needed frequently or quickly should be easy to access. Lid pockets and back pockets are perfect for snacks, gloves, cameras, map, compass, first aid kits and rainwear. Remember that pockets are the least waterproof areas of the pack and use Sea to Summit Ultra-Sil Dry Sacks to protect your gear where necessary.


  1. Stuff your rainwear into a pocket. If your rainwear is too bulky to fit into a pocket it should be tucked under the lid of the pack where it can be quickly retrieved.


  1. Try to avoid attaching equipment to the outside of your pack. In the bush, it is easy to damage or lose gear from the outside of your rucksack by snagging it on dense scrub. If you are travelling using a travel-pack, gear which is hanging off the outside of the pack is an easy target for thieves, and can be damaged or lost during baggage handling. It also makes the pack awkward to carry.


  1. The exception to the above is, of course, skis or mountaineering equipment. Skis are best carried on a pack by lashing them to the sides with compression straps or straps in plastic lash tabs. Secure them tightly to the pack, as they are prone to shift about while walking. Alpine packs often have patches of reinforced fabric on either the lid or front panel, which are designed for attaching crampons. Face crampons points on each other so as to limit any damage to the pack fabric.

Waterproofing:

Neither canvas nor nylon packs are totally waterproof. While the actual fabrics may be (and usually are) quite water repellent, water is still able to seep through the seams or zippers in wet conditions. You can improve the water proofness of the fabrics by applying dry water repellent products such as Nikwax TX Direct Wash-In Water Repellant or Revivex Durable Outerwear Water Repellent Spray these are available at Paddy Pallin stores or online at www.paddypallin.com.au. Because of the shape and construction complexity of most packs, sealing the seams of a rucksack, either in the factory or at home, is difficult not always effective.

The good news is that there are several other relatively simple ways to improve the weatherproofing of your pack. These include the following:

  1. One way is to use a waterproof pack cover like a Sea to Summit Pack Cover available from Paddy Pallin stores or online at www.paddypallin.com.au. Pack covers are like are like shower caps for your pack with an elastic hem which hugs the body of the pack leaving only the harness exposed. (So you can still carry it.) This system is great for travel packs as you don’t have to use a pack liner inside.
  2. For top-loading packs, another effective way is to use a waterproof pack liner such as the Sea to Summit Ultra-Sil Pack Liner available in Paddy Pallin stores or online at www.paddypallin.com.au. These are simply large bags made of light weight highly waterproof fabric with tape-sealed seams or welded seams to keep them waterproof, and a roll down top to prevent seeping. Pack liners are placed inside the pack to act as a lining. Look for a liner that extends higher than the actual body of your pack. (To you maximise the available space once you`ve rolled the top down.)  You could also use a sturdy plastic bag. Again make sure you use a bag taller than your pack, then you will have ample material to tie a gooseneck knot at the top. To do this, tighten the draw chord, twist the neck tightly and double it back on itself so it creates a U bend. Tie this off with the chord from the draw chord which is usually used to close of the top of your rucksack.


Another option, which works for both travel packs and rucksacks, is to use a collection of waterproof stuff sacks Such as Sea to Summit Ultra-Sil Dry Sacks These are like smaller versions of the pack liner described above. Or you could use Sea to Summit Compression Dry Sacks to help maximise the available space inside your pack. Both products can be found in variety of sizes at Paddy Pallin stores or online at www.paddypallin.com.au. One advantage of this approach is that by using different coloured stuff sacks, you can easily organise and locate gear within your pack. Stuff sacks are also effective in keeping dust and sand out of you gear. Using this method in conjunction with a pack liner will greatly increase your chances of being dry and warm when you most need it during periods of inactivity.

For tips on how to properly fit your pack for the maximum comfort level check out How to fit a pack, also in the technical information section of Paddy`s Diaries.


Why Use Duck or Goose Down

 Back to top↑

What is it?

Down is the layer of insulating fibres found under the tougher exterior feathers of birds. The best down is graciously provided to us by geese which live in at higher altitudes or in cold climates. Down naturally traps small pockets of air efficiently between its fibres. The fibres of down have a tendency to stick together, forming clusters, which in turn form air pockets of air. The pockets of air created by efficiently working down provide the best thermal barrier known.

Down insulation is rated by loft, measured as the number of cubic inches displaced by a given ounce of down (in3/oz). Higher loft downs will insulate better than lower loft downs of the same weight. Insulation in most outdoor equipment ranges from about 400 to 900in3. Down rated 500-700 loft is suitable for most conditions, 800-900 loft fill is used for very lightweight and/or very cold-weather gear.

As mentioned earlier down is an amazing insulator, especially for its weight. Because of its air filled nature it is also very compactable, making it the ideal product for packing into your bag and taking on your next adventure. Down is the preferred insulating fill of the outdoor enthusiast in sleeping bags and jackets.

Unfortunately when you use your sleeping bag your body produces moisture and oils which impede the ability of down to clump and loft as efficiently as it could. Packing your sleeping bag away into its stuff sack only perpetuates the problem. Here are some aftercare tips to help you properly care for your sleeping bag. Proper sleeping bag care will increase the bag life and your personal comfort level in colder conditions.

Venture into our Paddy Pallin stores to find out more or search for down products online Click here to view 


BPA and Paddy Pallin

 Back to top↑

What is BPA?

Bisphenol A, abbreviated as BPA, is a compound used in the manufacture of several types of plastics and plastic additives.

Which products is it found in?

It’s use in the production of polycarbonate plastic and epoxy resins makes it common in a variety of products including water bottles, sports equipment, medical and dental devices, lenses, CD’s and DVD’s, and household electronics. Epoxy resins are used as coatings inside of almost all food and beverage cans. Aluminum bottles contain this epoxy lining.

Has BPA been tested for safety?

It is one of the most extensively tested materials in use today, and has been in use in consumer products, researched and studies for over 40 years.

Does it affect my health?

Several scientific panels including the European Union's Scientific Committee on Food, the National Toxicology Program and the Harvard Center for Risk Analysis have concluded that the weight of scientific evidence does not support the hypothesis that low doses of BPA adversely affects human health.

Health Canada and the United States' National Toxicology Program (NTP) are completing their studies of the data collected to date. Both identify "some concern" (NTP, 2008) for "potential health risks" (Health Canada, 2008) relating to neural and behavioral effects in early stages of development, based upon several of the animal studies reported, but have concluded that with the data available it is too uncertain at this time to draw any conclusions as to possible effects in humans at early developmental stages.

Alternatives

Because of some of the concerns raised, manufacturers have developed BPA free plastic bottles and are now manufacturing more stainless steel bottles, which do not contain any epoxy linings.

BPA Free Bottles are now available in Australia through Paddy Pallin!


Further information on BPA:

*    European Food Safety Authority (EFSA) study - www.efsa.europa.eu/en/press_room/press_release/pr_bpa.html

*    American Chemistry Council - www.bisphenol-a.org
*    Environmental Protection Agency - www.epa.gov/endocrine/about.html
*    American Council on Science and Health - www.acsh.org/search/home_result.asp
*    Nalgene - www.nalgene-outdoor.com/technical/bpainfo.html
*    Health Canada - www.chemicalsubstanceschimiques.gc.ca/faq/bisphenol_a_qa-qr_e.html
*    National Toxicology Program - http://ntp.niehs.nih.gov/


Gore-Tex® Pro shell

 Back to top↑

For decades, W.L. Gore & Associates, makers of GORE-TEX® fabrics have dominated the waterproof-breathable garment market. Part of the reason for this market domination lies in their proven track record and part in their quest to keep on improving their technologies. GORE-TEX® Pro shell fabric is the result of years of development work and represents a huge increase in the performance potential of garments.


GORE-TEX® PRO SHELL is the optimum solution for outdoor professionals and serious enthusiasts, who need to face extreme weather and tough conditions. Made with the most rugged, most breathable, durably waterproof and windproof fabrics.

* Meets the demands of outdoor professionals and serious enthusiasts
* Engineered to excel in extended and extreme conditions
* Extremely tough, extremely breathable, durably waterproof and windproof
* Available in 2- and 3-layer constructions: 2 layers are supple and quiet; 3 layers are for extra-rugged use

  • Engineered with the most rugged, tear- and abrasion-resistant fabrics on the market
  • 3-layer construction: a specific high-performance GORE-TEX® membrane bonded to a tough outer material and a specially developed robust inner lining
  • Less moisture inside your garment means your insulating layers keep you warmer, and that you feel more comfortable.
  • Tough face fabrics are selected to ensure lasting protection even during rugged use.
  • Gore Micro Grid Backer Technology. Improves garment comfort and performance using an innovative patent-pending internal backer fabric. This new technology improves internal abrasion and snag resistance, enhances garment breathability, and decreases garment weight. It also allows the garment to slide easily over mid-layers.


Note: GORE-TEX® fabric is not magic and is not exempt from basic physical laws. Certain combinations of exertion, humidity, and temperature can cause you to sweat in GORE-TEX® fabric, or for that matter in shirt, or in bare skin.

Designed for

Consumers who desire maximum performance and extended comfort while outdoors.

Dedicated outdoor enthusiasts who push themselves regardless of the weather.

Those who seek the next technical advance in performance apparel and value high quality gear.


Hypothermia - The Cold Truth

 Back to top↑

The following article was written by Buck Tilton M.S. and Frank Hubbell D.O, from the Wilderness Medicine Institute. For more information regarding this article or wilderness first aid, contact Amanda or Julie on (08) 9331 6066.

When a body loses heat to the environment faster than it can produce heat, the body's core temperature starts to drop – a condition called hypothermia. The most susceptible organ in the human body to a lowered core temperature is the brain, which is designed to function optimally at approximately 98.6o F.


If the temperature is elevated above or lowered below this ideal temperature, the brain will begin to malfunction. In the case of hypothermia, normal thought processes are the first things to become impaired. Mild hypothermia could be termed "mild stupidity". The increasing impairment of the brain, as the core temperature falls below normal, continues from the newest and most complex functions of the brain (judgement, abstract thought) to the oldest most rudimentary processes of life (movement).

When the brain first senses that the body is losing heat faster than the body is producing it, it stimulates the primary defence mechanism against further heat loss-vasoconstriction of the peripheral circulation. This vasoconstriction of the peripheral circulation occurs in the skin, the affecter organ of the thermoregulatory system, preventing blood from reaching the surface of the skin where it will lose heat into the surrounding environment. The lack of blood causes the skin to become pale and cool.

If the core temperature continues to fall, the brain will stimulate the muscles to contract and relax or "shiver," a form of involuntary exercise designed to consume energy and produce heat with out requiring voluntary work. As the core temperature continues to fall, the brain will increase the intensity of shivering in an effort to rewarm itself. As long as victims are actively trying to rewarm themselves, they will shiver. For simplicity, shivering victims can be considered mildly to moderately hypothermic. As the temperature continues to drop, the shivering mechanism will not be able to produce enough heat to keep up with the heat loss, or the muscles will run out of fuel to burn to maintain the shivering. How long the defences can hold up against the cold depends upon the rate of heat loss. When shivering stops, patients have lost the ability to rewarm themselves. If temperature loss continues, the profoundly hypothermic patient may grow rigid and appear to have no pulse or respirations, yet life may remain. Without help, death will certainly result. This patient can be considered severely hypothermic.

Treatment of Hypothermia

1.  For the mildly to moderately hypothermic victim, almost anything that helps them create and maintain heat will help: fluid replacement, food (especially simple carbohydrates), exercise, external heat sources (e.g. fire or snuggling with another person). But remember, to stay warm you must stay dry. Change wet clothing to dry. If you crawl into a sleeping bag with a hypothermic person, it's best to use zip-together bags (to prevent crowding) and wear lightweight clothing (so your normothermic sweat doesn't dampen his or her hypothermic body). It takes time, but once mildly hypothermic patients have rewarmed, evacuation is not required.


2.  If the victim is severely hypothermic, and no longer actively generating heat, seek out or create a stable environment. This can be a tent, snow cave, bivouac shelter or hut. Just as it is impossible to treat a burn victim in a burning building, it is impossible to treat a cold injury in a freezer.


3.  Handle the patient gently. Rough physical movement can cause a victim's cold heart to stop. Carefully remove damp clothing. Assume clothing is damp. If victims remain wet or damp, they cannot be rewarmed.


4.  Surround them with a hypothermia wrap.

a.   Insulate them from the cold ground with a sleeping pad and surround them with multiple layers of insulation. It does not matter what you use to insulate them, as long as it is dry.

b.   If possible, place warm water bottles or heat packs in their hands and/or at neck, armpits and groin, but do not place heat sources against cold naked skin - wrap them first in extra clothing.

c.   Prevent convectional and radiational heat loss by wrapping them in anything windproof and waterproof.

d.   Pay attention to details. It is absolutely essential that the victim be completely surrounded by all layers. Protect the head where heat loss can be extreme. The only thing exposed to the environment should be their face.

e.   Do not expose the severely hypothermic patient to extremes of heat prior to hypothermia wrapping. Acid rich blood from inadequate peripheral circulation can be driven suddenly to the heart with fatal results.

5.  If they are conscious and able to swallow without fear of aspiration, give them a warm sweet liquid to sip. The shivering process consumes large amounts of energy. Muscles need sugar to shiver, and we need to replace the sugar being used up. If we do not keep adding logs to the fire, the fire will go out and the person will die. The hypothermia victim may not be able to digest solids, but will be able to absorb liquids.


6.  If the victim is unconscious or becomes unconscious, do not attempt to give them anything by mouth. Hypothermia wrap them and seek help for evacuation as soon as possible.


7.  Supplemental oxygen would be of great benefit to the unconscious hypothermia patient. If unavailable, mouth-to- mouth (or mouth-to-rescue mask) breathing may help keep a severely hypothermic patient alive.

Hypothermia is probably the leading cause of backcountry emergencies, injuries and searches. The first and most important effect of hypothermia is that it impairs the level of judgment and blunts our natural protective instincts. As a result we become lost, unaware of the environment and changing weather patterns, and we take chances. To risk hypothermia is to risk injury in an unforgiving environment where help is not immediately available.

Prevention of Hypothermia
Understand hypothermia and our susceptibility to it. Wear non-cotton clothing in layers, taking off outer layers before warming up and sweating, and adding them back on before cooling off. Be aware of changing weather patterns. Put on your rain gear before it starts to rain. Be aware of each other. Hypothermia occurs with little or no warning to the victim. Eat often, as you need fuel to burn to stay warm. Drink often as staying well hydrated is even more important than staying well fed. Pace yourself and your group to avoid over-exertion with resulting fatigue and loss of stored energy. Know your limitations. Realize that we are not well adapted to the cold. We have to rely upon extra equipment and resources to survive.


Layering

 Back to top↑

Clothing in the bush or when you`re traveling has to protect you from cold, heat and physical damage. The choice of clothing depends mainly on the expected weather conditions, keeping in mind that if the weather is changeable (as it frequently is in mountainous areas), you should allow for the worst. The design of garments and the materials from which they are made become increasingly more important as the weather gets worse. Your assessment of climate before you pack and depart is important. An assessment of the expected terrain and walking conditions is also important, because your clothing must be able to stand up to the wear and tear and protect you from the same conditions.

The range of conditions which can be encountered in the Australian outdoors are quite extreme - from blizzards of - 1 5'C to blistering heatwaves of 40'C and more. To be able to select appropriate clothing for any trip and to protect yourself from either freezing or wilting it is necessary to appreciate some basic principles, and to develop your own experience of different conditions. In the meantime it is best to adopt a careful approach before cutting down too much on important clothing.
 
The layer principle

This is a simple and well-proven principle of dressing for the outdoors. Use a number of light layers of clothing rather than a few layers of thick material. Not only does this maximise the insulating ability of your clothes by trapping air between the layers as well as within the fabric, but it also allows great versatility As your temperature rises and falls due to changes in conditions and activity, the layers can he added or taken off. 

Consider what layers you will need

Bushwalking clothing can be grouped into 4 basic categories: Base layer, mid layer, insulation layer and outer layer. Each type performs a specific task within a clothing system. Whether or not you need them depends on the trip you have planned.

1.  Base layer

Inner layer clothing is the most critical as it is worn right next to your skin. Its job is to keep you comfortable by wicking the sweat from your skin and disperse it to the next layer where it can evaporate.

Why? Water is a very good heat conductor. A wet garment against your skin can draw heat away from your body twenty-five times faster than a dry one. Even in conditions above freezing, this rapid heat loss can cause a dangerous drop in your body’s core temperature, leading to hypothermia.

The suggested fabrics for base layers are Merino wool and polypropylene. Merino wool products such as Icebreaker are soft against the skin, wick moisture and are excellent at moderating your body temperature, also Merino wool can be worn for longer before it gets smelly. Synthetics such as 360 Degrees Thermals polypropolene thermals or Helly Hansen Dry are light, strong and absorb very little water.

Base layers are available in light, medium and heavy weights to meet the demands of different activities. Light-weight for mild conditions or high aerobic activity where sweat dispersal is paramount. For more "stop and go" activities, mid-weight underwear provides greater insulation. Heavy-weight underwear is best in cold conditions where you are relatively inactive. Finally, the base layer should fit snugly but not be restricting.

2.  Mid layers

The primary function of mid-layer clothing is to provide basic insulation and protection in warm conditions. Mid layer items are often worn alone on short trips in good weather conditions. The pieces you choose should be comfortable, lightweight and more robust than your base layer clothing. Icebreaker have an excellent range of midlayer clohing which works well in conjunction with their base layer products.Click here to view Paddy Pallins range of clothing for all layers.


3.  Insulation layers

Insulation layer clothing is designed specifically to provide additional warmth. It's typically worn whenever mid layer and/or inner layer pieces are not warm enough for the current conditions. The insulation layers you use should be warm, lightweight and as non-bulky as possible. They should also breathe well to let sweat and body heat escape.

To slow heat loss, this layer must be capable of retaining the warmth that is generated by your body. Synthetics and wool are well suited for this purpose because the structure of the fibres creates small air spaces that trap molecules of warm air. Additional features such as pit zippers and full length front zippers allow venting. As with the base layer, this layer should be snug but not constricting.

As far as moisture management goes, synthetics absorb little water, allowing faster evaporation. Synthetic fleece/pile (pants, jackets, pullovers and vests), as well as being lightweight, are very durable.  Icebreaker make a great range of Insulating outer garments from Merino wool which while they won`t dry as fast as synthetics still perform the same functions. Down is the best insulator known see Why use Down for an explination of how it works.  Click here to view Paddy Pallin's range of clothing for all layers.

4.  Outer layers

The primary job of the outer layer clothing (both jacket and pants) is to protect you from the wind, rain and snow. But it needs to be somewhat breathable as well, to let sweat and body heat escape. Bushwalkers should always carry protective outer layers.

For dry conditions, a breathable (uncoated) wind shell may be all you need. If you expect conditions to be more severe, a shell made of a breathable/waterproof fabric, such as Gore-Tex®, or Epic shell will give you protection from wind and rain, as well as allowing water vapour to escape.

Having said that, there are no miracle fabrics. During vigorous activity, your body simply produces more water vapour than any fabric can disperse. The result can be a build-up of moisture on the inside of the garment, leaving you wet, clammy and cold. Strip off a layer or open any ventilation zippers before this happens.

Head insulation

It's estimated that up to fifty percent of a person’s total heat loss occurs through the head. Subsequently, your head acts like a radiator, letting heat escape. This puts a strain on the rest of your system because your body must now use additional energy to reheat the blood as it circulates.

A good Beanie(e.g. Merino Wool, fleece, polypropylene, polyester) will not only slow heat loss through your head, it will also make your hands and feet feel warmer because of the improved circulation. In extremely cold conditions, nothing protects your face or keeps in heat like a full-face balaclava or a scarf. Click here to view headwear

Hand and feet Insulation

 
In its effort to keep your head and your body's vital organs warm in cold conditions, the heart reduces blood flow to the extremities (hands and feet). These areas do not generate much heat on their own, so some insulation and protection from the elements is needed. Mittens are warmer than an equivalent pair of gloves because the whole hand contributes to the warming process, however mitts inhibit dexterity. Gloves are better for activities that require greater freedom of movement, such as tying knots, but because each finger must warm up its own little compartment, it makes them less efficient at keeping your hands warm.

A layering system that consists of a thin synthetic or Merino wool glove for moisture transport, an insulating mitten and a non-insulated shell mitten for outer protection will give you a wide range of temperature control, if you require more manual dexterity try using a lined glove shell.

Keeping your feet warm and dry is absolutely imperative on long bushwalking and ski touring trips. Your choice of socks can make or break a trip.see Choosing Socks

Again synthetic/wool blend or Merino wool is the preferred material and provides the best balance of moisture management, warmth and cushioning. The addition of a liner sock will add warmth and speed up moisture transport from the feet to the outer layer. You can sometimes avoid liner socks by purchasing thicker single socks made from a wool/acrylic/stretch nylon/polyester blend. Click here to view Paddy Pallin`s range of socks

Socks should fit snugly. If they're too tight, circulation can be restricted and your feet will get cold. Conversely, a loose sock can slip or move around, creating pressure spots that can lead to blisters.see Caring for your feet

Dressing using layers
If you’re too cold, too hot or too wet, it's hard to think happy thoughts, let alone focus on and enjoy what you are doing. Dressing in layers, instead of one or two bulky garments, can help prevent uncomfortable and potentially dangerous situations, such as hypothermia or overheating. Layering is the relatively simple concept of dressing in a way that allows you to adjust to a wide range of conditions. 


Snake Awareness & Protection

 Back to top↑

Gaiter manufacturer, Sea to Summit, regularly receives questions about the use of gaiters for snake bite prevention. This information has been offered by Bob Cooper, an Australian expert in reptiles and outback survival. NB: These guidelines are relevant for Australian snakes species and are intended as guidelines only.


Prevention better than cure:

When in remote areas or where snakes are present wear closed in footwear at all times. Use a stick or trekking pole to probe your way though long grass. Wear long trousers and or gaiters (or both) for maximum leg protection. Always carry three snake bite bandages and be well practiced in the First Aid treatment before “reality bites”. Consider snakes eat animals such as frogs and mice, not human legs. Keep your campsite clean of rubbish & food scraps, therefore attracting less critters that snakes like to eat. Do not try and catch snakes without being qualified to do so.


Gaiter advice:

The most densely woven, puncture resistant gaiter currently made by Sea to Summit is the Quagmire Canvas Gaiter. All Sea to Summit gaiters will add protection, but can never offer 100% protection against snake bites. However, wearing gaiters along with taking care in snake prone areas will greatly reduce the risk of being bitten. Click here to see the full range.


Facts about snakes: source Bob Cooper - www.bobcoopersurvival.com

We have about 20 species of snakes in Australia that are dangerous to humans, they all belong to a family called Elapid – which means they all have fixed front fangs, the two K9s are the only teeth producing venom.

Fortunately for us these Elapids have an average length of their venom delivering fangs at about 5mm. In very large snakes it is longer (eg a 2 metre King Brown can be 12 mm in length).

Most don’t have true hypodermic fangs but they are so close to being hollow that their delivery system is nearly as good.

The fact that they can all bite a flat surface means when they strike, they open their mouth up very wide to ensure a strike on their target – but they snap their mouth shut on first contact with the target. This means for us, they will often bite our trousers, clothing, boots or gaiters rather than our legs. This is the reason long furred cats and dogs attacking snakes often do not get envenomed.

There is no such thing as an aggressive snake - they are all acting in defense.

90% of the approx 3000 bites a year in Australia are on people trying to catch the snake.

90% of those bites are on hands or feet. 7% are treading on snakes and the other 3% is made up of putting hands in the wrong place and or sitting on them.

90% do not require anti venom because the snake is striking in defense and not a predator strike which is when they will “hang on” to their prey. The pressure and immobilisation bandaging treatment is extremely effective, I believe no one has died in Australia once this had been applied in the first instance. Treat all bites as serious.


Snake & outdoor survival training:

Bob Cooper a leader in Australian Outback Survival trainer and snake handler. Bob offers a range of training solutions for individuals and organisations on these topics. For more information see: www.bobcoopersurvival.com


Safe Drinking Water

 Back to top↑

Drinking pure water from clear-flowing stream surely is one of the fundamental joys of bushwalking. Unfortunately although it could be some of the cleanest, purest water on earth, any backcountry water source, no matter how high or remote, is susceptible to contamination from microscopic pathogens (disease-causing agents) due to practices of the creatures that visit it, including birds, animals and humans. It is a fact of modern life, which experienced wilderness travellers recognise, you need to play it safe with water in the wilderness.  Click here to go to "Choosing a Water Filter  

Suspended Matter: Floating debris such as leaves and sticks are not a problem. Silty or cloudy water containing a lot of clay, although unpleasant, is not a serious health risk unless it is combined with other pollutants. In most Australian bushland, a stream that is 'running dirty' without being in major flood usually indicates an unnatural, unstable catchment with eroding surfaces like farmland and dirt roads.

In alpine areas of other countries, some rivers are always discoloured by rock dust from glaciers upstream. Tea-coloured staining in otherwise clear water is common in Tasmania and many coastal areas. The cause is harmless tannic acid (as in tea!), naturally derived from the vegetation. Toxic blue-green algae may he present in streams with a very high input of nutrients which are flowing well below normal. Such water should not be drunk under any circumstances.

A filter is suitable for removing particulates. Preferably one that you can easily clean as silt and clay will quickly impede the flow rate.

Chemical: Chemicals including pesticides, heavy metals and fertilisers may derive from farmlands, urban areas or point sources such as factories and dumps (which are often on the fringe of bushland). This sort of pollution is common in Australia generally, but not so prevalent in bushwalking areas. A Natural catchment is usually free of dangerous chemicals, except in some locations where the eroding refuse of old mine workings can contribute heavy metals.

Filters that include an activated carbon element offer some protection against such materials found in water. Iodine is the only chemical treatment that should be considered. If you believe a water source contains any chemicals or toxins, either boil the water (which offers limited benefit) or better, move on.

Micro-organisms: Bacteria, protozoa and viruses are perhaps the most insidious threat to good drinking water. Whenever animal or human fecal material connects with a water source, it is possible that pathogenic micro-organisms could invade the water. They fall into 3 categories:

Protozoan cysts:  These are hard-shelled, single-cell parasites, the most well known being Giardia lamblia (ranging in size from 5 to 15 microns) and the resilient, lesser-known Cryptosporidium parvum (2 to 5 microns). Sources of these again include the faeces of both wild and domestic animals and those of humans. Unfortunately once Giardia is present in a catchment it might be there for good. It is a growing and potentially severe problem in Australia’s bushland.

Protozoan cysts range in size from 2 to 15 microns. They multiply in the digestive tract, where the cysts "hatch." Symptoms of Giardia (diarrhea, gas, nausea, cramps) appear within 1 to 2 weeks and last 4 to 6 weeks or longer. Symptoms of crypto (diarrhea, loose stool, cramps, upset stomach, slight fever) appear in 2 to 10 days and typically last 2 weeks. Giardiasis can be treated with prescription drugs; so far, cryptosporidiosis cannot. People with weakened immune systems could be at risk for more serious disease, particularly with cryptosporidiosis.

Portable filters and purifiers with fine pores, capable of trapping particles as small as 0.2 or 0.3 microns, reliably remove these bugs. Cryptosporidia are also highly resistant to iodine and chlorine.

Bacteria: These are smaller organisms, most of them commonly associated with food poisoning: E. coli, which is the main bacterium of concern, salmonella, cholera (common in some developing countries) and others. Sources of bacteria include domestic grazing animals, sewage plants, urban runoff and humans.

Bacteria range in size from 0.2 to 10 microns. Symptoms of infection (diarrhea is common) may appear within 6 hours or 3 to 5 days out. They may last 4 days or longer. In healthy people symptoms usually vanish within 5 days. Antibiotics can be used if needed.

Filters and purifiers are also effective in straining out these organisms.

Viruses: The tiniest of organisms, these include Hepatitis, rotavirus, Norwalk virus and polio. Viruses are the least common pathogens found in the wilderness (they are a significant threat in third world countries). Viruses that afflict humans usually only reach water sources via human fecal matter. Animals and humans, meanwhile, are common carriers of protozoa and bacteria.

Viruses range in size from 0.004 to 0.1 microns. Symptoms vary greatly for viral infection (acute gastroenteritis, diarrhea, nausea and jaundice), usually occurring within 1 to 2 weeks. Once exposed to the environment, viral particles exhibit a short lifespan and do not reproduce in water as some bacteria do.

Microfilters are incapable of trapping viruses but they can be inactivated by boiling, by contacting the chemical component found in purifiers, or by chemical treatment either before or after filtration.
 

A microscopic perspective
 

What is a micron? A micron is 1 millionth of a meter. A full stop at the end of a sentence is roughly 500 microns. The unaided human eye cannot see anything smaller than 50 microns. The straining ability of the pores in filters and purifiers is typically measured in microns, this is to allow a comparative measurement to the micro-organisms that you want to avoid.
Effectiveness of water treatments against contaminants
(NB: When the correct treatment is used properly)


Suspended matter(e.g. clay)


Chemicals
(e.g. heavy metals)


Protozoa
(e.g. Giardia)


Bacteria
(e.g. E.coli)


Viruses
(e.g. hepatitis)


Boiling


Nil#


Nil


Good


Good


Good


Chemicals


Nil#


Nil


Unreliable


Good


Good


Microfilters


Good


Nil*


Good


If 0.2 micron


Nil


Purifiers


Good


Nil*


Good


Good


Good


 You have 3 options for treating water:

1.  Boiling: Boiling is effective, very simple and is considered 100 percent effective against protozoan cysts, nontoxic bacteria and viruses. Bringing water to a rolling boil will kill the microorganisms in the water, if you are at altitude add 3 minutes longer, because of the lower boiling temperature. Boiling all water can take a lot of time and fuel, which will be very burdensome on a long trip.

Note: This is a method best suited to where the problem is limited, as when suspect water must be used for just one night rather than repeatedly. Boiling is an appropriate treatment for cooking water that is going to be boiled anyway.

2.  Chemical treatment: Exposing water to halogens such as iodine, silver or chlorine is believed to kill bacteria and viruses, but not all protozoan cysts. Being thick-walled organisms, Giardia and Cryptosporidia are resistant to chemical treatments, so microfiltration is recommended if you wish to be absolutely certain that the protozoan have been removed.

Halogens should also be given enough time to take effect, usually 10-15 minutes for pills to dissolve, very cold water or cloudy water requires a waiting period of 30-60 minutes (in either case read the directions carefully and follow them). If the treated water tastes to unpleasant then you can add either a neutralizing tablet, some powdered drink mix or run it through a carbon filter.

Note: Iodine is a very effective poison, including to humans in large quantities. Pregnant women should not use it or people who may be allergic to it and it can be unhealthy for people who use it for periods of longer than 14 days. Follow manufacturer instructions closely when using iodine or chlorine.

3.  Mechanical Filtration (microfilters): The most popular solution to water contamination, these are specifically designed hand held devices that clean water via a mechanical process, forcing it through a finely porous internal element housed within a filtering unit.

Microfilters operate on a mechanical principle. Using a hand pump and intake hose, both take in water from a creek or lake and force it through an internal element (a filtering "medium"). This medium traps suspended elements, from fine sediment to invisible microorganisms, before giving out clean water.

Definitions:

 Microfilters: Are microbiological devices that remove bacteria (e.g. E.coli) and protozoan cysts (Giardia lamblia, Cryptosporidium) from contaminated water.

Purifiers: Are microbiological devices that remove bacteria, protozoan cysts and viruses (e.g. hepatitis) from contaminated water.

Note: Viruses are too tiny to be trapped by a filter. Purifiers combine a filter with the addition of something that can render the viruses inactive, usually this is some form of iodine resin. Filter-makers contend that quality filters routinely capture 99 to 99.9 percent of viruses on the first pass since viruses (and bacteria) often become clumped with organic or mineral particles in water. These clumps are easy for filters to trap.

Does this mean purifiers are superior to microfilters?
Not necessarily, both offer a number of benefits that should be taken into account when you try to determine which system and what model will best answer your needs.

Some handy tips

  • Avoid filtering water in area where animal or human activity is obvious.
  • Try and filter water from still, clear water sources. Many microorganisms tend to sink to the bottom of still water; a turbulent stream keeps them suspended.
  • Rather than filter directly from the creek or lake, put water in a pot and filter from that. This gives you a chance to examine exactly how the water looks before you send it through your filter. This helps prevent clogging. If the water is cloudy, let it sit in the pot for an hour or so, then skim the clearest water off the top.
  • When you clean your filter, recognize you are handling a potentially contaminated object. Don't handle food or put your hands to your mouth after cleaning your filter.
  • Follow manufacturer instructions for cleaning and storage. At home, consider pumping a weak bleach-and-water solution through the filter to sterilize it. If you can disassemble your unit, allow it to dry out completely before storing it.
  • Humans can survive for an amazingly long time without food, but must have water regularly. Dehydration can cause heat stroke, hypothermia, frostbite, mountain sickness and death. Drink regularly; even when you don't feel thirsty.
  • In the summer you need at least three or four litres each day. In cold conditions your metabolism speeds up to generate more heat, so add an extra litre per day in the winter or above the snow line. Keep track of urine output: you should urinate at least three times a day. The liquid should be clear or light-coloured; a dark yellow colour is a sign of dehydration. For assistance on chosing a water purification system Click here to go to "Choosing a Water Filter


Caring for your Feet (Blister Prevention)

 Back to top↑

Blisters can be painful and debilitating

Blistered feet, pain and suffering through each step is not the way you want to remember your adventure. Although sometimes unavoidable blisters are at least manageable if looked after early and properly. Having said prevention is far better than cure take steps to avoid blisters and enjoy your trip for what it is.

Don`t go hiking in your new boots straight away: All boots require some breaking in. Leather boots in particular tend to be quite stiff when they are new. It will take some time for the leather to flex freely and evenly. If you don`t break your boots in properly it may result in painful and debilitating blisters. Blisters can be a terrible affliction when you are out in the bush. For this reasons, we strongly recommend that your first walks are short ones. Better still, wear them around the house or down to the shops, before progressing to a short day walks.

If you are not used to wearing boots, it may also take you some time to get used to the heavier feel and extra ankle support. Softer lighter weight boots are available and may be a good option for first timers. (depending on where you are heading.)  If your first trip is to be more than a short stroll, taking some running shoes in case you need to change is a good idea.

Socks: Quality Socks are just as important as quality boots. One factor in footwear and foot care that is often over looked is the importance of quality socks. Sock technology has come a long way from your standard wool or cotton blend. You just have to walk into a Paddy Pallin store or go online to www.paddypallin.com.au to see our vast range to see how seriously we take Socks.

Many people prefer to wear two pairs of socks and this is certainly a good idea if your boots are new. The best combination is a light liner sock under a heavier or technical sock (two thick socks may be too hot). A heavier technical sock provides the insulation, shock absorption and support. A lighter liner sock will help keep the foot dry and prevent blisters, particularly if it is made from a fabric which has good moisture transfer properties. Try  a merino wool or polypropylene liner in cool conditions, or a Coolmax liner in warm conditions.

Bear in mind that the thickness of the socks you choose will affect the fit of the boot. So when fitting the boots in the store you should always wear socks similar to those in which you intend to walk. Lace boots firmly (not tightly) to help prevent any movement.

Blister Prevention: Blisters are caused by friction, heat and sweating. Once a blister occurs it can be painful and debilitating. Blister prevention is key to making your walking experience much more enjoyable. Here are some tips on how to protect your feet.


Stay hydrated: Be sure to stay properly hydrated including sodium replacement if needed.

Shoes: Your shoes must fit properly to avoid blisters. Too snug or too loose is always a problem.  If you have not worn the shoes you wish to purchase before visit a Paddy Pallin store and see one our professional staff to make sure you are choosing the correct boot for your foot and purpose.

Otherwise ensure that there is a 10mm space between your longest toe and the end of your shoe. Be sure that you have enough room to wiggle your toes inside the toe box, and your heel does not slip when you walk.

Choose shoes that breathe well.

Inspect the inside of your shoes for seams or worn areas that might produce extra friction.

Socks: Do not wear socks that are too worn. Thin areas and holes are very likely to produce hot spots and blisters.

Do not wear untested socks on a long walk and never wear unwashed socks. Also follow manufacturer's washing instructions for the best results.

When walking distance carry a spare pair of socks. Change during your walk if your feet become sweaty or wet. (Tip: dust the inside of your spare socks with talcum powder and place in a ziplock bag).

Keep Dry: Using powder along with the right sock can really help. Use foot powder, talcum powder.

Lubricant: Many walkers use lubricants on their feet it is very common for ultra marathon walking. Body Glide is a great product for reducing friction and is available at Paddy Pallin stores or online at www.paddypallin.com.au. 

Blister Blocks, Second Skin: If you have specific places that are prone to blisters you might try applying one of these prior to your walk. These items can be used as a preventative, or to provide cushion and protection after a blister has formed. Blister kits are available from Paddy Pallin stores or online at www.paddypallin.com.au


Wrapping and Taping: Tape any pressure points or hot spots before they become blisters: Wrapping toes with moleskin or taping feet with athletic tape is also a common practice. If you wrap your feet it is important that the tape is applied smoothly (no wrinkles) and not too tight. Ultra walkers might tape their entire foot, but most walkers only need to tape up hot spots.

Hopefully using a combination of the preventatives above you will come away blister free. It is important to apply the products prior to your walk if you are prone to blisters. You can also carry supplies with you on your walk. Stop and apply as soon as you feel a hot spot to prevent a blister from forming.


Caring for your feet (Blister treatment)

 Back to top↑

  1. Clean around the area of the blister with warm water and soap. Consider adding anti-bacterial ointment.


  1. Decide if you want to let the blister heal by itself, or whether you want to drain it. As a general rule of thumb, if the blister is not making walking painful, then you should let it heal by itself.


  1. If it is impractical to let the blister heal, treat it by draining it. If it is impractical to let the blister heal, treat it by draining it. Start by sterilizing a needle with alcohol and boiling water.


  1. Insert the needle at the side and base of the blister and allow all the liquid to drain.Insert the needle at the side and base of the blister and allow all the liquid to drain. Carefully insert at the edge of the blister and allow it to drain.

Do not remove the loose skin that covers a blister, as this opens it to infection.

  1. Cover the blistered area with a compeed dressing, mole skin, second skin then a gauze bandage, plaster, or other protective cover. Cover the now protected blistered area with a gauze bandage, plaster. Try to avoid placing the cover on any forming new skin which will initially be tender.


  1. Allow the blister to heal in the open air as much as possible.


  1. If you continue the exercise which caused the blister apply a donut shaped piece of mole skin to the area. The donut hole should be the area with the healing blister skin. Leaving it uncovered will allow it to heal, while the moleskin around it will prevent other friction.


  1. Check the blister daily and continue to keep it clean.


The Basics of Navigation

 Back to top↑

Every outdoors person should be as handy in the use of a map and compass as they are with a knife and fork. With a good map, and knowledge of its use, you can visualise the other side of a mountain, or what lies in the deepest valley. It is easy to proceed confidently into unknown country and get to a destination without fuss or bother. Knowledge of map reading and the use of the compass is an indispensable skill of bushcraft. Without this skill, a walker is a passenger and mere follower on a trip. To become a good navigator takes experience, and lots of it, but just as with walking you can start easy and work up. Eventually you will develop a feel for terrain that will become second nature.


Navigation is about getting from one place to another. It is no more difficult than using the following few basic skills.

  • Observation of your surroundings.
  • Keeping track of features you pass, like hills and creek junctions. This is usually done mentally, though sometimes rough notes may help.
  • Estimating how far you have travelled.
  • Recognising important features when they are reached.

People navigate using these skills all the time in the everyday world by figuring out where they are in relation to identifiable objects like roads, buildings, prominent landmarks (mountains, rivers), unique objects (the Sydney Harbour Bridge, Parliament House). The difference between everyday navigation and wilderness navigation is that instead of using objects like buildings, intersections and streets to get from place to place, bushwalkers tend to use natural features and landmarks.

These observations are then related to the map, and only occasionally is the compass used as a check. The compass is simply a reference, which points, in a given direction. Although this review concentrates on bearings and other technicalities of the compass, it is better when starting to learn about navigation to concentrate on becoming familiar with interpreting maps - this can only be done by practice and plenty of time in the bush with map in hand.

Compass technicalities can be hard to learn from a book - it is better if you can get an expert to run you through them. Most of navigation is map reading - that is relating features shown symbolically on a piece of paper, to what you see around you. You are seeking to answer three fundamental questions: where am I, what direction do I take, and how far do I go?

The tools of the trade


Maps: These provide you with a bird's-eye view of the prominent features in a given area. Knowing how these features relate spatially to one another can help you:

  • Figure out where you are on your map simply by looking at the world around you.
  • Figure out where your final destination is in relation to you, even if you can't see it (assuming you know your location on your map).

Compasses: These help you navigate more precisely from point to point. This can be extremely important in the wilderness, where even small mistakes can result in you walking right by your destination without seeing it.

Types of maps


Topographic maps: Are generally made by government agencies, and are the most commonly used, since they give the best picture of the country. They are drawn from data obtained by aerial photography, which is very accurate providing the cartographer makes the correct interpretation. Unfortunately errors are sometimes made. Contour lines are used to indicate the shape and steepness/depth of hills and valleys. Many also include information about prominent man-made features like tracks, roads and bridges.

Sketch maps: Are usually produced by outdoors people for specific uses and are only available for a limited number of popular areas. Hills are often indicated pictorially, so accuracy is sometimes low. However, special details of tracks, passes, campsites and water availability are invaluable. Where possible, use both sketch and topographic maps together. Many sketch maps have become out-dated, due to changes in roads and tracks since they were drawn, but walking tips can still be relevant.

Orthophoto maps: Are similar to topographic maps, but are printed with an aerial photograph of the ground as a background to the other data. A fair idea is obtained of the pattern of vegetation, but other detail sometimes suffers. They are only available for limited areas. Contour lines are used.
Other maps. There are other types of maps, including cadastral maps showing property boundaries. They are seldom of value for bush navigation. Some tourist maps and the like can be useful for planning trips or getting to the start of your walk.

Map parts

A map is a symbolic representation of the ground. To read a map requires knowledge of the symbols and how they are used.

Scale: The relation between a length on a map and its corresponding distance on the ground is called the scale, given by a representative fraction. The most useful scales are 1:25 000, 1:50 000 and 1: 1 00 000. Naturally there is less room for detail on a 1: 1 00 000 map than there is in a 1:50 000 map, whilst the 1:25 000 scale can show very fine detail. The 1:50 000 scale is a good compromise for most bush navigation, though you don't always have much choice. Large areas of remote Australia are only covered by the 100 000 series, which are not renowned for their accuracy on features like roads and tracks, although the topography is adequate.

Contours: Hills and valleys are shown by contour lines, which join points of the same height. The vertical distance represented by two adjacent lines is called the contour interval. Thus, if you climb (or descend) a hill from one line on the map to the next, you will have moved vertically a distance equal to the contour interval: 10, 20 and 40 metres are typical values, depending on the map scale and steepness of the terrain.

Using the numeric information from the contours and the interval information from the bottom of the map, you can figure out:

  • How high your current position is (assuming you know where you are on your map)
  • How high any other specific point on the map is
  • How steep the terrain is between where you are and where you want to go
  • The steepness of a given area on a topographic map is determined by how close together the contour lines are in that area. The closer the lines are together, the steeper the terrain will be.


Grid: The Australian map grid is a system of lines drawn over maps of the whole of Australia and is related to latitude and longitude. The lines are 1000 metres apart to scale. The grid is used to identify points on a map, somewhat like a city road map, except six figure numbers are used. Details of how to use these references are given on most maps that have the grid. You should be able to use grid references, as they are the main way of transferring route information from one person to another, as in route guides.

North pointers: There are three norths: true, magnetic and grid. For the area covered by a given map, the relationship between true, magnetic and grid north is usually shown by a diagram.

  1. True north is the direction of the north geographic pole. The borders of most maps are true north and south, with north usually being at the top. A check should always be made - particularly of sketch maps.
  2. Magnetic north, to which compasses react, coincides with true north in Australia along only one line. The difference between the two is called the magnetic declination. (Hot linked)
  3. Grid north is the direction of grid lines: almost true north and south. The difference is usually small enough to be ignored for our purposes.


NB: To understand the relationships fully it is recommended that you read a book with a good outline, such as Paddy Pallin’s - ‘Bushwalking and Camping’, or take a short course.

Conventional symbols: are fairly standard, but there are often variations and the legend should he checked. The non-topographic information that a map provides can be as crucial to navigation as the topographic information, especially for beginning bushwalkers. This additional information includes things like:

  • The paths of access roads in the area
  • The location of tracks and campsites
  • Wilderness area boundaries
  • The proximity of nearby towns and villages


Different maps provide different levels of this information.

Date and maker: The shape of hills does not vary appreciably over decades, but map-making methods do. Unnatural features like roads and buildings can alter overnight. The date and maker of a map are important guides to its reliability.

THE COMPASS

A compass will not show you where to go, but it does point in a constant direction - magnetic north - providing there is nothing nearby to mislead it. Being magnetic, it must not be used too close to electric currents or magnetic and steel objects like knives, spectacle frames, fences, cars and corrugated steel sheds or tanks. While half a metre might be a safe distance to be away from a pocket knife, 10 or 20 m is probably better for a shed - not so much for its size, but rather because it is stationary and thus may have its own induced magnetism.

There are a few locations where natural deposits of iron-rich rock play havoc, with compasses, such as Tabletop Mountain in the Snowy Mountains, but beware of imagining phantoms to explain away navigational puzzles - the fault is nearly always in the navigator!
Insert diagram of example of compass

Principles of the compass

Bearings: Compasses are basically designed to show you where north is in the real world. Knowing where north is allows you to identify all of the other directions in the "compass rose" (south, east, west etc.) as you travel and to head in those directions.
Insert diagram of example of bearing. Click here to view the Paddy Pallin range of compasses   

Many compasses take this one step further, by allowing you to assign a specific numerical direction, called a ‘bearing’, to any direction in the full 360° circle around you. This means you can head toward a very specific spot, rather than simply heading on a more general heading (e.g. southwest).

To convert general compass directions into bearings, a compass has a special rotating bezel mounted around the outside edge of the compass needle. This bezel, which is divided into 360° usually in 2° to 5° increments°, measures the direction towards a given object in terms of an angle; specifically, the clockwise angle between a straight line pointing due north and a straight line pointing toward the object. This bezel allows you to express any specific direction as a number between 0 and 360.


Back bearings: When following a compass bearing from some feature, you may want to check back to that feature to see if you are on course, or you may wish to retrace your steps. The bearing in the reverse direction is called a back bearing and is simply 180' different from the forward bearing. The best method of obtaining a back bearing is - leaving the compass set at the forward bearing and held in front of you - simply turn around. There is no need to add or subtract 180': the south end of the compass needle now points to the north mark on the compass dial, and the travel arrow on the compass base points on the back bearing.

The importance of bearings: Following a bearing that is just one degree off can translate into a 25metre variance over a kilometre. This means that after a 10km walk, you may miss your target by over 200metres. In the bush, a few metres can mean the difference between spotting a track or creek and missing it completely.
Being able to measure directions in terms of specific compass bearings can also help in a number of critical situations.

  • Knowing the bearing that the target you are heading for is on (river, house, campsite etc.), allows you to travel even if the weather closes in or night falls.
  • Knowing the bearing allows you to keep you on track even if you have to detour around an object in your path (your compass will allow you to turn from your original course, get around the obstacle safely, then turn back and find your exact course again).
  • Knowing how to take bearings can help you pinpoint your location on your map even if you are completely lost, using a technique called triangulation (discussed below).

Note: Knowing how to use a map and compass is very important for all bushwalkers. If you do get lost, or you have to cross an area of land without tracks, your map and compass may be the only tools that can get you back home safely.

Triangulation

Triangulation is one of the most common and most useful navigation techniques that use both a map and a compass. It is a simple procedure that, when done correctly, can pinpoint your exact position on your map even if you have no idea where you are.

Looking around you try to identify two unmistakable landmarks, say two peaks. If you take 2 accurate bearings on the two peaks, and draw a line on your map from each landmark along the bearings taken, your location will be where the two lines intersect. Triangulation is based on the principle that once you've taken a bearing on a visible landmark (i.e., established in what direction that landmark lies from your present position), you can logically assume that your position lies somewhere along a line drawn to that landmark along that bearing, the second bearing allows you to define the point.


Magnetic Declination

Map and compass navigation works on the principle that you know one thing at all times and that is where north is. To find north, you simply look at where the red end of your compass needle is pointing.

The problem is that navigation is based on knowing where "true north" is, i.e. the North Pole. And unfortunately, that's not where compass needles really point. Compass needles actually point toward "magnetic north," a point that is close to true north, but not right on top of it. And this is where "declination" comes in.

Declination is the angular difference between ‘true’ and ‘magnetic’ north. The tricky thing about declination is that this angle is different depending upon where you are standing in the world.

Declination is usually indicated diagrammatically with a series of arrows drawn on a map. These diagrams are often not to scale so always use the values, not the drawing to set your compass.

People navigate successfully with maps and compasses all the time, even though magnetic north and true north don't always line up. How? They simply figure out what the angle of declination is in their general area, and then make sure that they take that angle into account when they make their navigation calculations (basically, by adding or subtracting the angle of declination from the compass bearing numbers that they read off their compasses). Some compasses can be set so that they remain adjusted for an entire trip.

"You can never be lost if you don't care where you are" 


Types of Climbing

 Back to top↑

Climbing is the process of moving, generally upward, on rock, ice or mountains. Beyond this basic definition, it becomes more specific depending on the style, the objective and the size of the piece of rock being climbed. Following is an outline about what the more specific styles of climbing involve as well as definitions of some of the terms associated.

If all you knew about rock climbing and mountaineering was learnt from looking at magazines or reading books like ‘Into Thin Air’ or ‘Freedom of the Hills’, you might conclude that all climbers are crazy. The reality is, that many sane relatively fit, yet otherwise unremarkable people go climbing and mountaineering every year. Their goals can vary greatly, but chances are they have one thing in common, the desire to enjoy themselves and get home safely at the end of the day.

Bouldering
Bouldering is done both outdoor and indoor on rock faces, boulders, buildings (buildering) and other surfaces close to the ground. It is extremely popular with all levels of climbers for a number of reasons. It allows you to focus all your strength and technique on climbing a particular boulder problem, usually without the fear of falling far or dealing with ropes or rock protection, which can sap your strength and concentration.

Without the need of much climbing gear to try it (climbing shoes, chalk bag and a crash pad), you can push yourself or learn new climbing techniques in relative safety. Although you are usually close to the ground, the risk of injury is still present and it may be useful to have a couple of climbing friends who can act as spotters (to catch your fall) on the awkward problems or where the landing is hazardous. Click here to view climbing gear

Indoor Climbing (also known as gym climbing)
Much of the boom in climbing's popularity over the last few decades is due to the proliferation of artificial "climbing walls" and gyms built around a series of these walls. Indoor rock climbing is a great way to get started as a climber and a harness, chalk bag and a pair of climbing shoes is all the gear you need to participate. Reputable rock gyms go to great lengths to make things fun, safe and easy for beginners. With climbing walls having "top-rope" set-ups to minimize risk, and a variety of climbing routes to choose from, it is easy for you to progress at your own speed.

Most climbing gyms have instructional courses and before they let you use the facilities first-timers must pass a simple "belay test". For some people, climbing indoor’s is as adventurous as they ever want to get, while experienced climbers can use them to hone their strength and skill despite bad weather or lack of daylight.

Sport Climbing
Sport climbing involves climbing routes that already have anchors affixed in the form of ring bolts or carrot bolts to the rock in tthat you can attach your rope to. This allows the climber to concentrate more on the gymnastic movement required to complete a climb and less on placing protective pieces to prevent a fall. Sport climbing will require you to carry light weight snap gate carabiners with nylon connectors called "quick-draws". Quik draws are clipped through the ring bolts or bolt plates (which you will also need to take up with you in the case of carrot bolts) at one end and the rope is clipped through the other. This in conjunction with an effective belay protects you from falling too far.

Sport climbs can range from easy routes which give the indoor climbers a feel for the exposure of climbing on real rock , without the inherent difficulty of placing protection, to unbelievably difficult "problems" where incredible effort, strength and technique is necessary to move from one improbable hold to the next.

Traditional Climbing
Since this style predates both climbing gyms and sport climbs, this kind of climbing is euphemistically known as "trad" (for traditional) climbing. As well as carrying a rope and quick-draws, you also require special gear called "rock protection" or "pro". These usually metallic devices, expand, twist, or wedge into cracks or holes in the rock, and, provided they are securely placed in sound rock, are fed through carabiners or slings attached to the climbing rope. The combination of rope and protection will "catch" a lead climber in the event of a fall.

Traditional climbing is more adventurous than sport climbing, in that you dont simply follow a line of bolts to the top you must find and follow the route, finding places to put protection as you go. Although routes may vary in technical difficulty, (generally easier trad routes are more prolific than easier sport routes.) a greater level of experince and knowledge of how to safely place effctive, and effecient protection is required. Because the climber places his or her own protection it is definitely more gear intensive, and therefore more costly. Click here to view climbing gear

Aid climbing
Aid climbing is one of the earliest of all rock climbing techniques. Aid climbing is an integral part of big wall climbing, that is, climbing a wall that often requires more than a day to climb, and therefore requires sleeping on natural ledges or hauling a portable ledge up the wall with you. Big wall routes are usually long, grueling and risky. Because they cannot be top-roped, climbers must bring large amounts of climbing gear with them to anchor themselves to the rock as they climb.

Originally, aid climbers would drive iron, and later, steel, pitons into weaknesses in the rock, clip a ladder-like device called an étrier to the piton, and stand up to do it again. This need to pound pins has evolved into "clean aid". This evolution has occurred because of the scarring, cost and effort caused by the continual hammering in and removal of pitons. Aid climbing requires the standard equipment of the rock climber’s rack, as well as some specialised aid climbing gear.

Giant, multi-pitch wall climbs require strength, endurance, mental toughness and expert rope skills, as well as a tremendous amount of equipment of a more specialized nature (refer specialised reading to learn more).

Ice climbing and mixed climbing
So what do you do in winter? Snow and ice are changing environments that make climbing challenging and exciting. It is an environment in which mountaineers and sport climbers enjoy everything from moderate-angle walks up glaciers to the vertical challenge of frozen waterfalls and fierce, wind-whipped, snow-covered faces. Ice climbing provides an outlet for those who like to suffer and know fear.

Ice is extremely slippery and cold to the touch and as a result ice climbing requires much different gear and technique than rock climbing. Climbers use sharply pointed ice tools and crampons, which become extensions of the climber's hands and feet. Because of the temperatures and dangers associated with ice, warm clothing and a helmet are essential. Footwear varies from alpine touring ski boots when starting out, to a pair of plastic or leather mountaineering boots, just as long as they are warm, stiff and comfortable.

The rope systems can be the same as those used for rock climbing, as can the carabiners and slings, but the climb is protected by using ice screws (hollow metal tubes that are screwed into the ice). Recently, the pursuit of harder ice routes has led to climbs that are barely formed or do not make a continuous path to the top of the pitch. Rather than abandoning them and tackling more well-formed climbs, climbers ascend mixed climbs of startling difficulty, climbing long sections of rock using crampons and ice tools (dry tooling), then performing gymnastic and often dangerous lunges and moves to pull up sections of vertical or overhanging ice. These climbs are protected on the rock and ice by whatever means possible, screws, pitons, cams, nuts can all be used.

Mountaineering
The types of climbing that have been mentioned so far often exist in isolation from each other. However, mountaineering might require you to use all of these skills on a single expedition or climb. Often considered the pinnacle of the climbing pyramid, mountaineering is the story of challenging routes on distant peaks, often taking a month or two due to complete because of the severity of weather and objective hazards encountered en-route. Such expeditions not only involve climbing skills, they also tests your teamwork, camping skills, navigational ability, first aid experience and even your survival instincts.

Mountaineering is general classified in two seasons with winter mountaineering the more serious. Winter travel (skis or snowshoes) is often fraught with avalanche danger, inclement and fast-changing weather, short days and frigid temperatures. At this time of year a high degree of self-reliance, fitness, and competence is essential. When starting out it is wise to set modest objectives and choose experienced partners to climb with.

Summer mountaineering is fraught with avalanche danger and fast changing weather. The days are slightly longer and the temperature can be kinder. Depending on the nature of the climb, any routes with snow and ice can often be harder in the summer. The variable nature of mountaineering requires climbers to carry a variety of equipment. From a walking axe to crevasse rescue equipment (the standard array which includes two prusik cords or jumars, a pulley or two, as well as anchors, such as a snow stake).

Footwear again depends on the both the altitude and the season, with leather mountaineering boots or plastics essential, though the extreme temperatures encountered at high altitude require a careful choice in respect to their insulation. Some people also prefer to use a lighter weight boot, particularly if there is a substantial amount of hiking to get to the objective. One last important piece of gear, which cannot be over stressed, that is a helmet. Click here to view climbing gear

Climbing Glossary


So you don’t understand everything they talk about! Browse through this section and it will help you understand both the gear and the language that climbing uses.

A

Abseil - To make a controlled descent on a fixed rope. The term is typically used in Europe and Australia and is from German and means ‘to rope down’. Rappel is a French word and means ‘to retrieve’.

Accessory cord - A nylon cord that is sold in a range of diameters, it can be made of more specialised material, such as Kevlar or Spectra. The cord has very low stretch (static) and is used for making anchors, slings, and prusik loops.

Active protection - Refers to climbing protection that has moving parts, typically with springs. Examples include spring-loaded camming devices (SLCD’s) and sliding wedges.

Aid climbing - A type of climbing where the climber makes use of ropes and gear to support ‘aid’ the route, rather than features on the rock itself.

Alpine style - An approach to climbing peaks in which the ascent is made in one push, usually by traveling as light as possible.

Anchor - A point of attachment for a climbing rope, that holds a climber or team to a wall, slope or cliff with rope, slings and carabiners. Anchors can include trees, blocks, bolts, or any form of natural protection.

Approach - The route or walk in to the base of a climb.

Ascender - Used to allow a person to move up a rope or to haul gear. They are mechanical devices (e.g. jumars), which slide in the upward direction and lock when a downward force is put on to it.

B

Backup - Any additional protection that is added to provide support to an anchor.

Barn dooring - When a climber swings out (like a door) as a result of being off-balance. Often occurs when the climber is in a layback position.

Belay - An old sailing term, meaning to secure. Technically it means to keep a climber from falling too far by using friction on the rope. The system includes the rope, anchors, belayer and belay device.

Belayer - The person who manages the rope that prevents the climber from dropping to the ground in case of a fall or a slip.

Bergschrund - The uppermost crevasse on a glacier, where the glacier separates and flows away from the snow/ice field that feeds it.

Beta - Concerns any information about a climb that is given before an attempt is made. For example, sequence of crux moves or type of protection needed. "Running beta" is information given while the climb is being executed.

Big wall - Extremely long, multi-pitch route that often takes more than a day to complete.

Bight - A bend in a rope.

Biner - Short for ‘carabiner’.

Bivouac - A usually temporary camp with little protection from the elements. Mountaineers often bivy on summit days, when it is impractical to carry full camping gear.

Bivy - Short for ‘bivouac’.

Bolted route - A climb protected with pre-placed bolt anchors rather than removable natural gear.

Bolts - Metal bolts drilled into the rock for use as protection on climbs or for aid. Hangers are attached to the bolts before clipping a ‘quickdraw’ and then your rope.

Bombproof - A hold or anchor that offers absolute security, for example, a top-rope anchor around a large tree, or double ring bolts.

Bouldering - Climbing close to the ground without the use of a rope. Typically used for practicing technique, training strength or just playing around at the base of a crag. Bouldering has more recently evolved as a unique climbing style and grown in popularity.

Bucket - A very large incut hold that you can wrap your fingers over.

Burly - A Powerful or strenuous move or climb.

C

Camalot™ - Spring-loaded camming device made by Black Diamond.

Camming - The act of rotating (finger, protection etc.), into a space until wedged or tight.

Carabiner - Metal loop (usually aluminum) used for holding the rope and connecting it to gear, with a spring-loaded gate on one side. May be oval, pear or D-shaped. They are often referred to as a ‘biners’ or ‘crabs’.

Caving - The sport of cave exploration using many of the same techniques and gear as climbing.

Chalk - Is made from magnesium carbonate. Climbers use chalk to counteract sweaty hands and improve grip.

Chalk bag - Small pouch, usually with a drawstring closure, worn on the harness to hold the chalk.

Chest harness - A harness used in conjunction with a seat harness to keep the body upright. They are used mostly as support when abseiling with a heavy pack or for glacier travel.

Chock - Used to describe a passive piece of protection wedged into a crack for use as a rope anchor during a climb.

Choss - Description for loose pile of rotten rock or very marginal holds.

Classic - A term used to describe a climb of some renown, either locally or worldwide.

Clean - To remove protection as you second, or follow, a lead climber. Sometimes you might ‘rap’ down and clean the route.

Copperhead - A cylinder of copper alloy swaged to a wire loop and pounded into shallow cracks or depressions and used for body weight aid placements.

Cordelette - A 6 to 8m length of 6-8mm cord tied in a loop and used to equalize several belay anchors.

Core - Central fibres of a climbing rope. See sheath.

Cornice - Overhanging lip of snow, formed by wind, on the top of ridges. The lip overhangs in the leeward direction.

Couloir - A gully filled with snow or ice.

Crab - Slang for a ‘carabiner’.

Crag - A small cliff, or general term for a climbing area.

Crank - To pull down hard on a hold or sequence of holds.

Crevasse - A deep crack in a glacier.

Crimper - A small feature or hold which only your fingertips can contact.

Crux - The hardest part of a climb, pitch or boulder problem.

D

Daisy chain - Runner with multiple loops so that there are many places to clip into it. Often used by aid climbers.

Deadpoint - The top of a swing or controlled lunge, when upward motion has stopped but downward fall has not yet begun.

Deck - Slang for falling and hitting the ground. Not recommended.

Drag - Friction created when a climbing rope passes through multiple pieces of protection, especially if they are not in a straight line up the route. Can pull a lead climber off balance.

Draw - Short for ‘quickdraw’.

Dynamic - Climbing rope that elongates or stretches to absorb the impact of a fall.

Dyno - A dynamic move or lunge between holds.

E

Edging - Technique in which the climber stands on small ledges or crystals with the edges of climbing shoes rather than the soles.

Epic - Slang term for a climbing adventure that was long, arduous and provided some sort of unexpected excitement.

Expedition style – A conventional approach to climbing big peaks in which the ascent is made by shuttling gear and establishing a series of camps that eventually puts the climbers in a position to make a summit bid.

F

Face - The relatively smooth portion of a cliff. A face climb typically uses the features that protrude from a rock face.

Figure 8 - A belay/rappel device with a figure 8 shape. Also a knot used typically for tying the climbing rope to the climber's harness.

Fixed line - A rope left attached to an anchor so it can be readily used for ascending or descending.

Flag - A move in which a foot is placed off to one side, not necessarily on a hold, in order to prevent barn dooring.

Flash - A red point ascent (first try on lead) after prior inspection, information or beta from others.

Free climb - A climb using only hands and feet on the rock to support the climber’s weight. Rope is used to protect them from a fall, but is not relied upon for upward progress.

Free solo - Climbing without a rope or belayer.

Friction - A style of climbing that involves few positive holds and relies on balance, footwork and pressure over the feet and hands, for grip on the rock face.

Friends - Were the original spring-loaded camming devices which is often used as a generic term for SLCD’s

G

Gaston - Describes a move where a hand is in the opposite directions and pulling away from the other.

Gate – The spring-loaded opening on a carabiner. Can be straight or bent, locking or non-locking.

Glacier travel technique - In order to prevent an injury from a fall into a crevasse, partners must walk roped together. Prusik loops should already be attached to the rope so that the climbers can prusik out of a crevasse or set up a pulley system to help the other person out.

Glissade - A quick method of descending a snowfield, in which the climber sits, crouches or stands, with an ice axe ready for self-arrest, and slides down the slope. In the sitting or crouching position, the tail of the axe can be used as a rudder to control direction and speed.

Grade - The difficulty rating attached to a climb.

Grigri - The first belay device with an auto-locking mechanism to catch a climber's fall.

Gripped - Scared witless.

H

Hang dog - To climb a route while resting on the rope or putting weight onto the protection.

Hanging belay - To belay while suspended by your harness to anchors without a substantial ledge to stand/sit on. Atmospheric.

Harness - A webbing belt and leg-loop system that attaches a climber to a rope. Full-body harnesses are used for rescue and for children. Chest harnesses are used with seat harnesses, usually for caving or glacier travel.

Heel hooking - Describes the move of placing your heel on a hold while climbing and using it for leverage or balance. You can use this maneuver effectively to rest or pull off of with holds that are above a roof or overhang.

Hexentrics - Original name for 6-sided, hollow passive protection that either wedges or rotates into place in a crack.

Hex - Short for ‘hexentric’.

Hueco - A hole or pocket in the wall/rock.

I

Icefall - The fractured, tumultuous, unstable part of a glacier, where it flows over a relatively steep drop.

J

Jam - To wedge a body part into a crack on a rock climb in order to gain leverage.

Jingus - Used to describe marginally placed pro that inspires fear or ‘manky’ old bolt.

Jug - Large easily gripped hold. To ‘jug’ means to climb using an ascender.

Jumar - The original mechanical ascender and now often applied to all brands of ascenders.

K

Kernmantle - Nylon climbing rope construction consisting of a core (kern) covered by a braided outer sheath (mantle).

Kevlar® - Name for a fibre used in climbing cord, which has high tensile strength and resistance to cutting.

Knee-bar - Move that involves the knee and foot creating counter-pressure (with one leg), such as between two ledges on a climb that may allow the climber to let go with one or both hands and rest.

L

Lead climb - Style in which the first climber (the leader) climbs, either clipping the rope into bolts or placing protection as they go. Belayed by the second, below you.

Layback - Climbing technique that back refers to the body position of leaning backwards and to one side with arms straight and feet shuffling up the wall, while using counter-pressure of hands pulling and feet pushing.

Lower off - The way in which a belayer brings a climber down from a climb, by letting the rope out through the belay device.

M

Manky - A piece of protection that is questionable, it may or may not hold in the event of a fall.

Mantle - A move in which the climber uses a hold to press up onto straightened arms, then brings his/her feet up to match on the same hold.

Mono - A hole into which only one finger will fit.

Multi-pitch - A climb longer than one rope length.

N

Nut - Passive protection piece consisting of a wedge-shaped piece of metal affixed to a wire.

Nut tool - A small, hooked pick used to remove protection when seconding (following) up a climb. They are designed to remove both passive and active (SLCD’s) gear.

O

Off-width - A crack that is wider than a hand or foot but too narrow for a climber to climb into and chimney. Not recommended

On sight – Refers to the attempted ascent of a route without any prior beta, or having seen or worked the moves.

P

Passive protection - Any piece of climbing protection that does not have moving parts. This includes nuts, assorted stoppers, and hexes etc.

Pinkpoint - Same as a ‘redpoint’, but with pre-placed protection or draws.

Pitch - The length of a climb that can be protected by 1 rope length.

Piton - A piece of metal, that varies in size and width that is hammered into a crack and then clipped to the climbing rope for protection.

Protection – Any gear used to secure a climbing rope to rock, snow or ice to protect a climber from falling to far.

Prusik - A loop of cord or webbing that is wound around a rope of larger diameter. When the knot is properly tied and weighted, it should not slip, due to friction. When un-weighted, it can slide up or down the rope.

Pumped - The feeling you experience when your muscles (usually in the forearms) are so tired or full of lactic acid to hang on anymore.

Q

Quickdraw - A short piece of webbing with a carabiner, often sewn in, at each end.

R

Rack - The selection of gear taken by the climber to be used on a climb. Sometimes used to refer to a climbers complete collection of this gear.

Rappel - To self-lower from the top of a climb using a rope.

Red point - Description of the ascent of a climb, placing protection without falling or resting on the gear, regardless of any prior attempts or beta received.

Route - The name given for a path or specific set of moves up a climb.

Runner - Loop of nylon webbing used to attach the climbing rope to protection or to make anchors.

Runout - The distance between a climber and their last piece of protection. The longer the runout, the bigger the fall.

S

Sandbag - The name given to a climb that is significantly more difficult than it’s grade suggests.

Screamer - A long fall.

Second - The next person to follow a leader up the climb, usually removing the protection as they go.

Send - To redpoint a route.

Serac - A block or tower of ice on a steep glacier or in an ice fall. Seracs are very unpredictable and can collapse spontaneously, thus creating very hazardous climbing obstacles.

Sewn-up - An expression used to describe when a climber on lead has placed large amounts of protection at very close intervals, negating the possibility of taking a big fall.

Sheath - The woven outer cover on a climbing rope or accessory cord.

Slack - The name given to paying out extra rope.

SLCD (Spring-loaded camming device) - A piece of active climbing protection, consisting of a number of cams on a stem with a trigger bar. The trigger allows you to compress the size of the unit, so that it can be placed into a pocket or crack. When the trigger is released the unit expands and locks into the slot (this is dependant on how well placed it is!!). The rope is then clipped with a runner to this piece of protection.

Sling - A sling of nylon or Spectra/nylon, webbing or cord. These can be single, doubled or tripled, depending on the length of the sling and have many uses in climbing (anchors, runners etc.).

Sloper - A hold, which is sloping, but is not incut.

Smearing - A climbing technique, in which the sole of the shoe, plus proper weight over the feet, provides purchase on the rock through friction.

Solo - Climbing alone, though not necessarily without the protection of a rope.

Spectra® - Polyethylene fibre used for rope or cord, which provides exceptional strength and no stretch.

Sport climbing - Climbing routes on which pre-placed bolts are used for protection.

Spot - To protect a climber/boulderer, by preparing to prevent them hitting the ground if they were to fall.

Static - A Kernmantle rope with a limited amount of movement or stretch. It is not designed to take a fall like dynamic rope. Static ropes are used for abseiling, caving and rescue. Accessory cords are also static.

Stemming - Technique in which the hands and/or feet are used in opposition, pressed against each side of a corner or wide chimney.

Stick-clip – When a stick or other modified device is used to attach the rope to the first bolt of a climb from the ground.

T

Take - Command issued by a climber to the belay to take in the slack rope and hold the climber tightly.

TCU (three-cam unit) - SLCD with 3 moving cams, rather than four.

Toe Hook - The same type of maneuver as a heel hook, only executed with the toe.

Top rope - The situation where the belay point is above the climber. This describes most climbs in ‘climbing gyms’.

Traditional climbing (‘trad’) - Rock climbing using protection placed by the climber on lead and removed by the second.

U

Undercling - A type of move that requires the application of counter-pressure to the underside of a hold by pulling up on it, while pushing down on the feet.

W

Webbing - Woven flat profile nylon tape, used for making slings and runners for climbing.

Whipper - A long lead fall.

Winger - As above.

Wire - Metal cable at the end of a nut or chock that allows a carabiner to be attached, sometimes used to refer to the whole piece.

Wired - To know a climb so well that you can complete it with apparent ease.

Z

Zipper - When a series of protection placements pop out in sequence when the leader falls. 


Lifetime Club Membership

Join the Paddy Pallin Club for $10.00 and receive a 10% discount on all future purchases.*

Benefits

Exclusive Club Member sales, promotions, and events!
*Club Member discount not applicable to gift cards and services such as repairs. Discount may not be used in conjuction with any offer